
- Claas
- Grove
- New Holland
- Komatsu
- Kubota
- John Deere
- Linde
- Bomag
- CASE
- Clark
- JCB
- Jungheinrich
- Linde
- Yale
- Yanmar
- Manitou
- Manitowoc
- CNH
- Doosan
- Fiatagri
- Fiatallis
- Fiatallis Other Manual PDF
- Flexi Coil
- Ford New Holland
- Ford New Holland Other Manual PDF
- Huyndai
- Hypac
- Hyster
- Hyster Service Manual PDF
- Isuzu
- Kobelco
- Kohler
- Krupp
- Lombardini
- Mahindra
- Nuvera
- Perkins
- Sperry New Holland
- Utilev
- Versatile
- ZF

Yanmar ViO33-6 Mini Excavator Operation Manual
$20.00
- Type Of Manual: Operation Manual
- Number of Pages: 216
- Size: 29.2MB
- Format: PDF
-
Model List:
- ViO33-6 Mini Excavator
- 1. Yanmar construction equipment europe s.a.s. thank you for purchasing a yanmar machine
- 2. DECLARATION OF CONFORMITY
- 3. Introduction
- 4. Safety signals
- 5. A Description and illustration of the machine
- 5.1. Applications and regulations
- 5.1.1. Applications
- 5.1.2. Warranty
- 5.1.3. Driving permits
- 5.1.4. Lifting
- 5.2. Identification plates
- 5.2.1. Machine serial number plate
- 5.2.2. Engine serial number plate
- 5.2.3. EPA information plate
- 5.2.4. Spare parts order and intervention request
- 5.3. Warning labels
- 5.3.1. Location of the warning adhesive labels
- 5.3.2. Explanation of the warning adhesive labels
- 5.4. Identification of important parts
- 5.4.1. General view of the machine
- 5.4.2. Commands and switches
- 5.5. Description of the driving position
- 5.5.1. Operator display station
- 5.5.1.1. Indicator lights
- 5.5.1.2. Clock
- 5.5.1.3. Time counter
- 5.5.1.4. Diesel gauge
- 5.5.1.5. Cooling fluid temperature indicator
- 5.5.1.6. Preheating light
- 5.5.1.7. Navigation keys
- 5.5.1.8. Information and error icons
- 5.5.2. Switches
- 5.5.2.1. Start key
- 5.5.2.2. Headlight switch
- 5.5.2.3. Horn
- 5.5.2.4. Windscreen wiper switch and windscreen wiper
- 5.5.2.5. Ventilation switch
- 5.5.2.6. Engine rate setting
- 5.5.2.7. Engine slow down switch
- 5.5.2.8. Eco mode switch
- 5.5.2.9. Engine stop switch
- 5.5.2.10. d gear switch
- 5.5.2.11. Interior lighting switch
- 5.5.3. Joysticks and pedals
- 5.5.3.1. Locking lever
- 5.5.3.2. Right command lever
- 5.5.3.3. d hydraulic circuit control (P.T.O. 1)
- 5.5.3.4. Left command lever
- 5.5.3.5. Travel levers and pedals
- 5.5.3.6. Blade lever
- 5.5.3.7. Protection of pedals
- 5.5.3.8. Boom rotation pedal
- 5.5.4. Power socket
- 5.5.5. Drivers seat
- 5.5.6. Seat support cover
- 5.5.7. Location for the tools and user manual
- 5.5.7.1. Toolkit
- 5.5.7.2. User manual
- 5.5.8. Fuses
- 5.5.8.1. Fusebox
- 5.5.9. Ash tray
- 5.5.10. Cabin
- 5.5.10.1. Cab side door
- 5.5.10.2. Upper windscreen
- 5.5.10.3. Lower windscreen
- 5.5.10.4. Right hand cab window
- 5.5.11. Headlights
- 5.6. Operation of the air conditioning
- 5.7. Covers
- 5.7.1. Bonnet
- 5.7.2. Cover B
- 5.7.3. Cover R
- 5.7.4. Rear cover
- 5.8. Heating valve
- 5.9. Options
- 5.9.1. Long arm
- 5.9.2. Half-circuit
- 5.9.3. PTO line 1
- 5.9.4. PTO line 2
- 5.9.5. Circuit breaker
- 5.9.6. Document holder
- 5.9.7. Additional counterweights
- 5.9.8. Lifting Kit
- 5.9.8.1. Lifting ring
- 5.9.8.2. Safety valves
- 5.9.8.3. Overload switch
- 5.9.8.4. Lifting Tables
- 5.9.9. Movement alarm
- 5.9.10. Plug-in beacon and rear LED light
- 5.9.11. Fleet management system
- 5.9.12. Radio
- 5.9.13. Air conditioning
- 5.9.14. Quick hitch
- 5.9.15. Continuous pressure hydraulic line
- 5.9.16. Mechanical quick hitch
- 5.9.16.1. Mechanical quick hitch ACB
- 5.9.16.2. Mechanical quick hitch L-SYSTEM
- 5.9.17. Quick hydraulic hitch L-SYSTEM
- 5.9.17.1. Dismantling the accessory
- 5.9.17.2. Mounting the accessory
- 6. B Operating instructions
- 6.1. Basic precautions
- 6.1.1. Comply with your workplaces safety rules
- 6.1.2. Put the safety mechanisms in place
- 6.1.3. Wear suitable clothing and protective equipment
- 6.1.4. Do not drive under the influence of alcohol, drugs or medication
- 6.1.5. Provide adequate ventilation when working in an enclosed space
- 6.1.6. Protect plants from hot air and exhaust fumes
- 6.1.7. Keep fuel and oil away from sparks
- 6.1.8. Avoid removing the caps when the temperatures are high
- 6.1.9. Avoid crush injuries due to accessories
- 6.1.10. Have an extinguisher and a first aid kit
- 6.1.11. Avoid any unauthorised modifications
- 6.1.12. Precautions for optional parts and tools
- 6.1.13. Warning concerning the cab windows
- 6.1.14. Cabins emergency exit
- 6.1.15. Air conditioning system
- 6.2. Usage precautions
- 6.2.1. Precautions before starting the engine
- 6.2.1.1. Make sure that your workplace is safe
- 6.2.1.2. Clean the machine
- 6.2.1.3. Check the safety structures
- 6.2.1.4. Check the position of the blade
- 6.2.1.5. Accessing the machine
- 6.2.1.6. Fasten your safety belt and adjust the rearview mirror(s)
- 6.2.2. Movement precautions
- 6.2.2.1. Machines Danger Zone
- 6.2.2.2. Movement and accessories
- 6.2.2.3. Driving the machine on a slope
- 6.2.3. Working precautions
- 6.2.3.1. Precautions for using the equipment
- 6.2.3.2. Dangerous tasks
- 6.2.3.3. Working near electricity lines
- 6.2.3.4. Working near obstacles
- 6.2.3.5. Emergency stop and securing the machine
- 6.2.3.6. Working on a slope
- 6.2.3.7. Working in an area covered with snow
- 6.2.3.8. Working on unstable ground
- 6.2.3.9. Working in a submerged area
- 6.2.3.10. Working in a muddy area
- 6.2.3.11. Working in an area with reduced visibility
- 6.2.4. Parking precautions
- 6.2.5. Precautions for the accessories
- 6.2.6. Precautions for using optional accessories
- 6.2.7. Precautions for the battery
- 6.3. Precautions for the engine
- 6.4. Checks before starting the machine
- 6.4.1. Overall visual inspection
- 6.4.2. Checking and topping up the level of cooling fluid
- 6.4.3. Checking and topping up the engine oil level
- 6.4.4. Checking and topping up the fuel level
- 6.4.5. Checking and topping up the hydraulic oil level
- 6.5. Checks after start-up
- 6.6. Checks after use
- 6.7. Operator LCD display station interfaces
- 6.7.1. Indication of functions
- 6.7.2. User Interface
- 6.7.3. Maintenance interface
- 6.7.4. Machine usage management interface
- 6.7.5. Configuration interface
- 6.8. Using the machine in cold weather
- 6.8.1. Preparation for use in cold weather
- 6.8.2. Starting in cold weather
- 6.8.3. Precautions after use
- 6.8.4. When cold weather is over
- 6.9. Rubber tracks
- 6.9.1. Correct use of rubber tracks
- 6.9.2. Comparison between rubber tracks / steel tracks
- 6.9.3. Rubber track warranty
- 6.9.4. Precautions for using rubber tracks
- 6.9.5. Track maintenance
- 6.9.6. Track replacement
- 6.10. Handling the bucket
- 6.10.1. Machine stability when using with a bucket or an accessory
- 6.10.2. Compatible accessories
- 6.10.3. Operation of the retro bucket
- 6.10.4. Digging trenches
- 6.10.5. Loading
- 6.11. Handling of accessories
- 6.11.1. Hydraulic hammer SOCOMEC
- 6.12. Accessory change by direct coupling
- 6.12.1. Dismantling the accessory
- 6.12.2. Mounting the accessory
- 6.12.2.1. Loading bucket
- 6.13. Load lifting
- 6.14. Implementing the 3rd hydraulic circuit
- 6.14.1. Description
- 6.14.1.1. d circuit selector
- 6.14.2. Mounting the accessory
- 6.14.3. Precautions for using the accessory
- 6.15. Transporting the machine
- 6.15.1. Loading/unloading the machine
- 6.15.1.1. Precautions for loading/unloading the machine
- 6.15.1.2. Procedure
- 6.15.2. Immobilising the machine on the truck
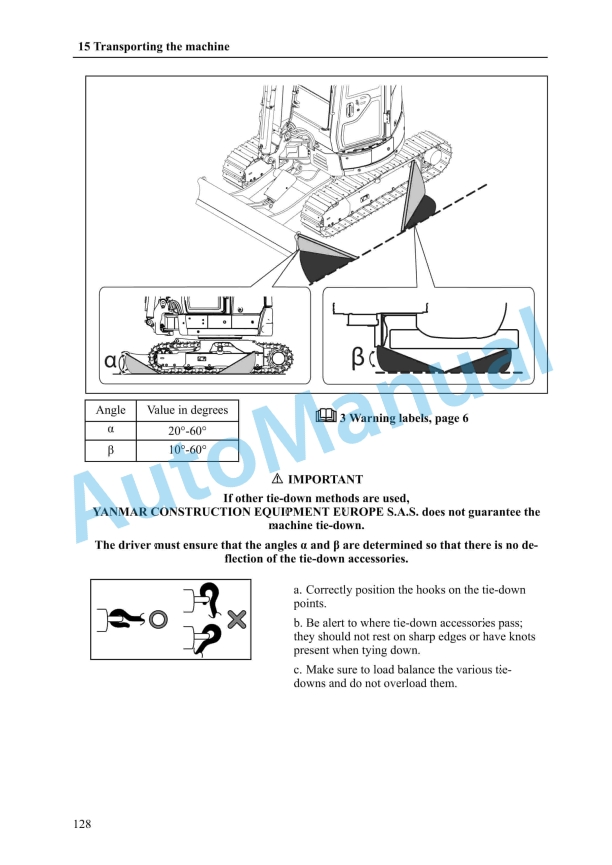
- 6.15.3. Tying down the machine
- 6.15.4. Slinging the machine
- 6.16. Detecting anomalies
- 6.16.1. Phenomena that do not constitute faults
- 6.16.2. Detecting anomalies
- 6.16.2.1. Engine
- 6.16.2.2. Electrical equipment
- 6.16.2.3. Machine structure
- 6.17. If the battery is discharged
- 6.17.1. Precautions for connecting and disconnecting the starter cables
- 6.17.2. Connecting the starter cables
- 6.17.3. Starting the engine
- 6.17.4. Disconnecting the starter cables
- 6.17.5. Charging the battery
- 6.18. Towing the machine
- 7. C Periodic maintenance programme
- 7.1. Periodic inspections and upkeeps
- 7.2. Maintenance precautions
- 7.2.1. Precautions before maintenance
- 7.2.1.1. Removing the residual pressure
- 7.2.1.2. Place a warning label
- 7.2.1.3. Establish a safety perimeter
- 7.2.1.4. Keep the machine clean
- 7.2.2. Precautions during maintenance
- 7.2.2.1. Oil and grease
- 7.2.2.2. Tools
- 7.2.2.3. Parts
- 7.2.2.4. Dismantling the accessory
- 7.2.2.5. Working under the machine
- 7.2.2.6. Lighting
- 7.2.2.7. Battery
- 7.2.2.8. Hoses
- 7.2.2.9. Radiator ventilator
- 7.2.2.10. Soldering
- 7.2.2.11. Waste processing
- 7.3. Recommended greases and fluids
- 7.4. First maintenance
- 7.4.1. After the first 50 hours of service
- 7.4.2. After the first 250 hours of service
- 7.5. List of periodic inspections and maintenance operations
- 7.6. Maintenance by the operator
- 7.6.1. Daily maintenance
- 7.6.1.1. Checking the machine before use
- 7.6.1.2. Checks after using the machine
- 7.6.1.3. Checking the commands
- 7.6.1.4. Checking the seat
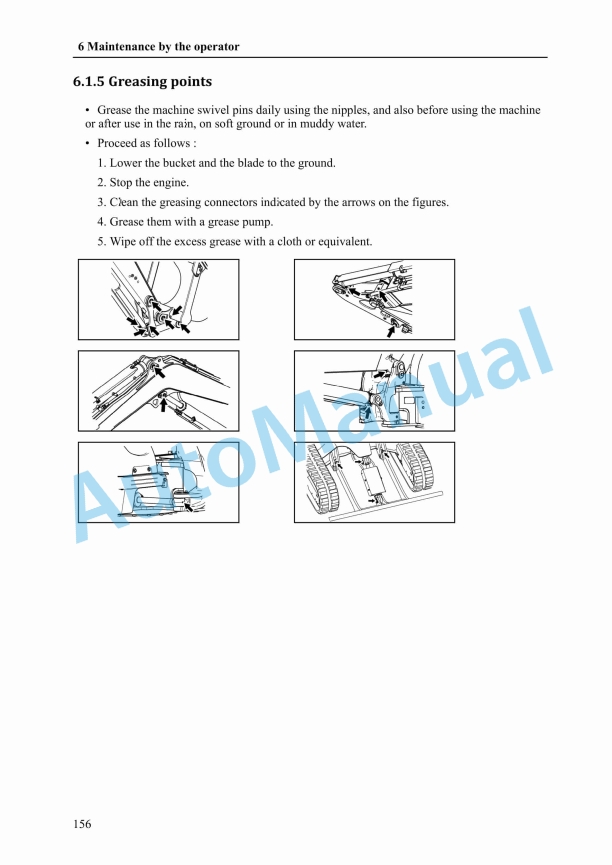
- 7.6.1.5. Greasing points
- 7.6.1.6. Cleaning the separator/decanter
- 7.6.1.7. Purging the fuel tank
- 7.6.1.8. Checking the hydraulic hoses
- 7.6.1.9. Visual inspection of the fuel hoses
- 7.6.2. Maintenance every 50 hours
- 7.6.2.1. Greasing the pin and rotation crown
- 7.6.3. Maintenance every 15 days
- 7.6.3.1. Checking the air conditioning/heating system
- 7.6.4. Non periodic maintenance
- 7.6.4.1. Fuse replacement
- 7.6.4.2. Top up the windscreen washer fluid
- 7.6.4.3. Replacing the windscreen wiper
- 7.6.4.4. Accessory state check
- 7.6.5. Rubber track maintenance
- 7.6.5.1. Checking the condition of the tracks
- 7.6.5.2. Track replacement
- 7.6.5.3. Tension check
- 7.6.5.4. Increasing the tension
- 7.6.5.5. Releasing the tension
- 7.6.6. Steel track maintenance
- 7.6.6.1. Checking the condition of the tracks
- 7.6.6.2. Track replacement
- 7.6.6.3. Tension check
- 7.6.6.4. Increasing the tension
- 7.6.6.5. Releasing the tension
- 7.7. Maintenance by the dealer
- 8. D Conservation and storage
- 8.1. Conservation
- 8.2. Storage
- 8.3. Recommissioning
- 9. E Technical data
- 9.1. Specifications
- 9.2. Working dimensions
- 9.3. Noise emitted by the machine
- 9.4. Vibrations emitted by the machine
- 10. F Lifting capacities
- 10.1. Lifting ViO33-6 Canopy
- 10.2. Lifting ViO33-6 Cabin
- 11. Appendices
- 11.1. A List of error codes displayed on the operator display station
- 11.2. B Control sheets to be photocopied
- 11.3. C Notes
- 11.4. D Lashing record

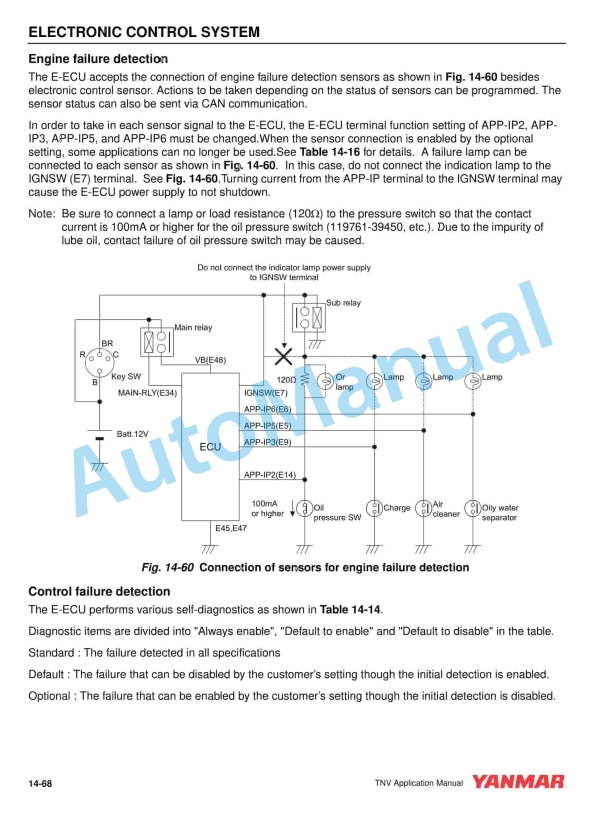
Yanmar Operator Manual PDF
Yanmar Operator Manual PDF
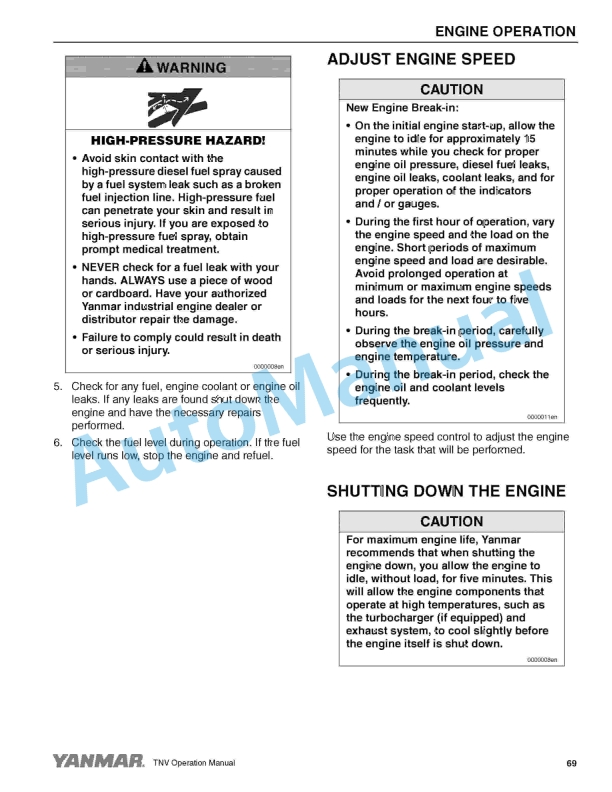
Yanmar Operator Manual PDF
Yanmar 2TNV70 to 4TNV106T Industrial Engines Operation Manual 0ATNV-U00101
Yanmar Operator Manual PDF
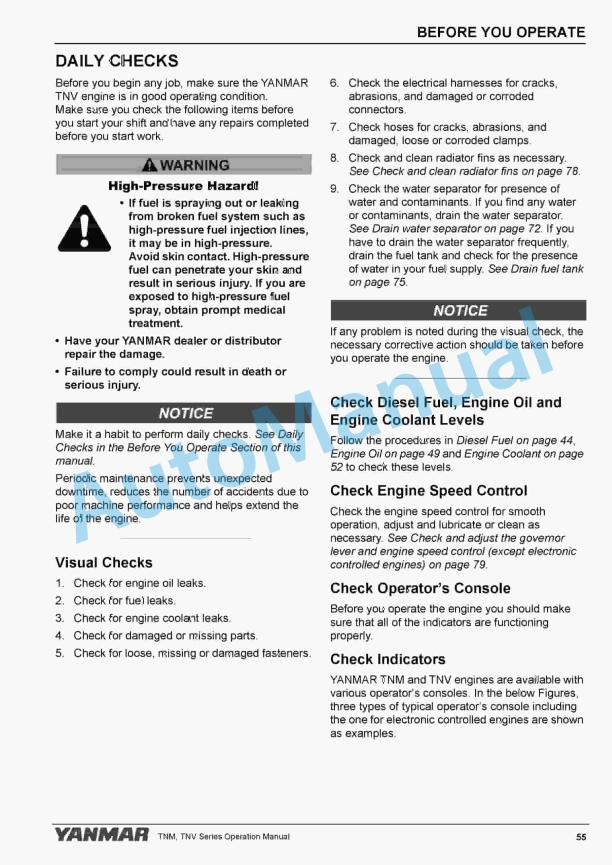
Yanmar 3TNV74F, 3TNV76F, 3TNV80F, 3TNV80FT, 3TNV88F, 3TNM74F Industrial Engine Operation Manual
Yanmar Operator Manual PDF
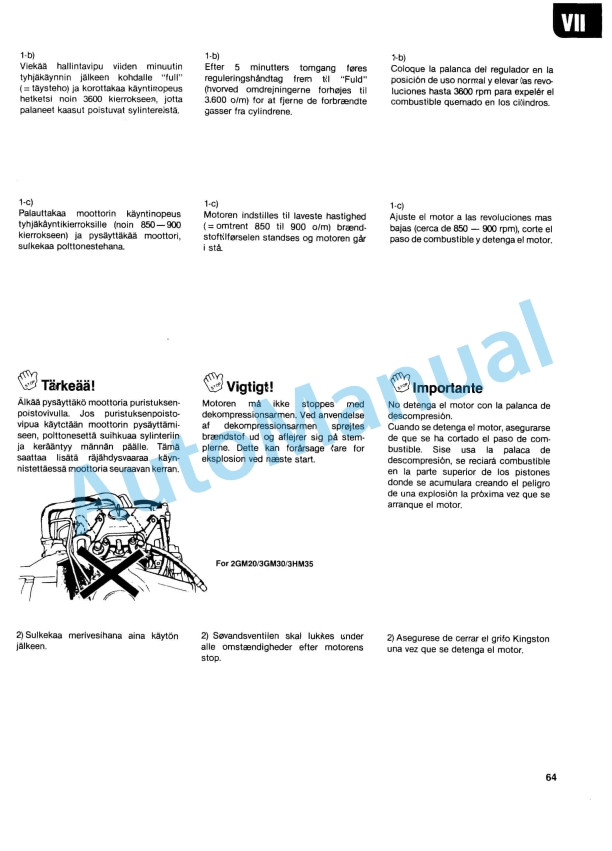
Yanmar 1GM10, 2GM20(F), 3GM30(F), 3HM35(F) Engine Operation Manual
Yanmar Operator Manual PDF
Yanmar 2TNV70 to 4TNV106T Industrial Engine Operation Manual 0ATNV-G00100
Yanmar Operator Manual PDF
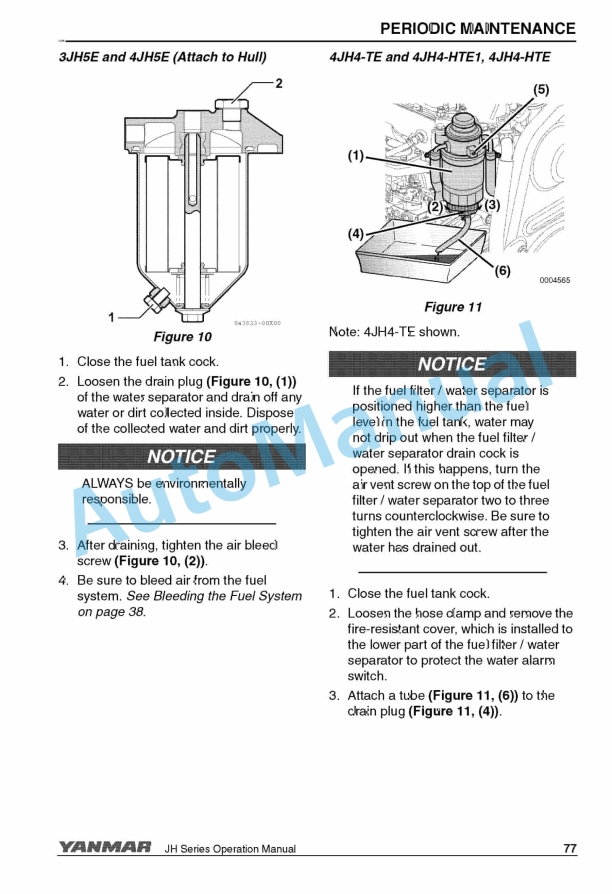
Yanmar 3JH5E, 4JH5E, 4JH4-TE, 4JH4-HTE Marine Engine Operation Manual
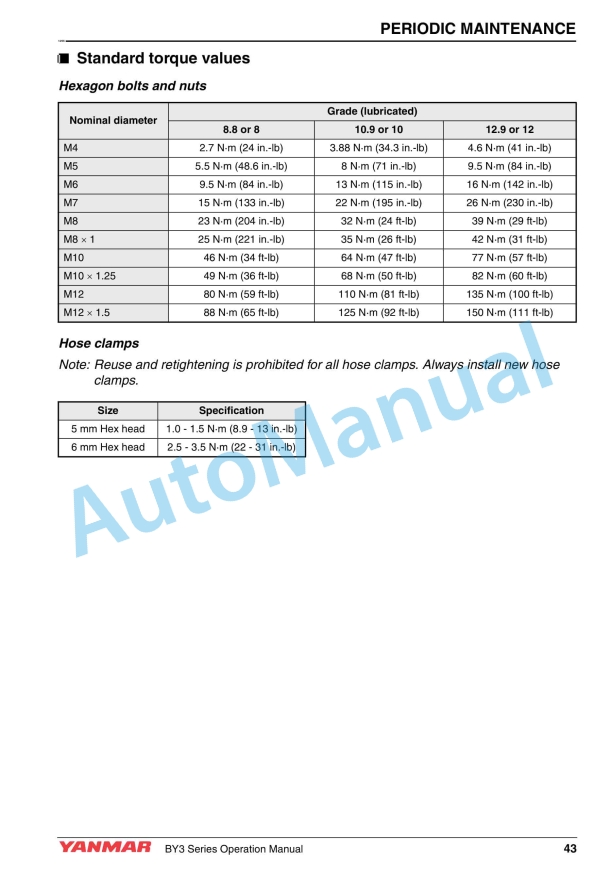
Yanmar Operator Manual PDF

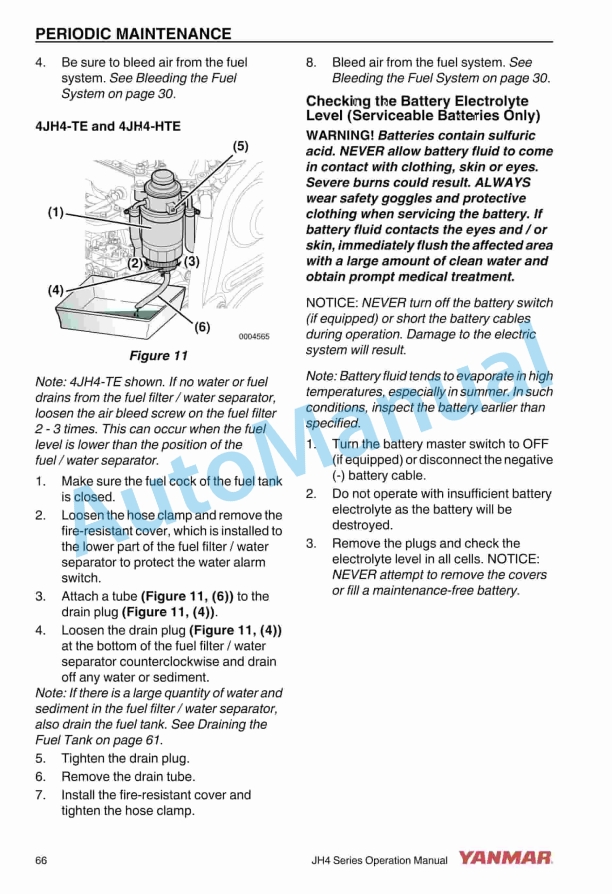
Yanmar Operator Manual PDF
Yanmar 3JH4E, 4JH4AE, 4JH4-TE, 4JH4-HTE Operation Manual 0AJH4-G00102
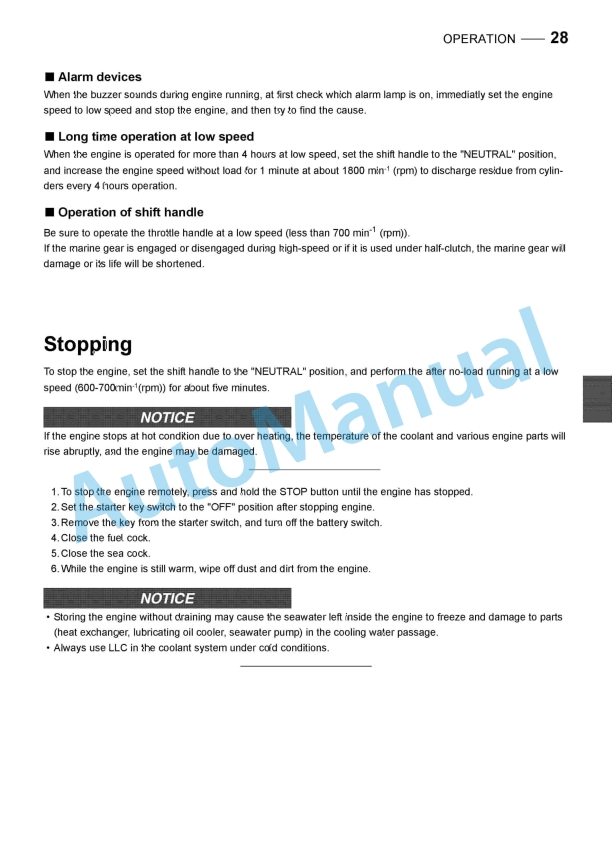
Yanmar Operator Manual PDF
Yanmar 4CHE3, 6CHE3, 6CH-HTE3 Marine Propulsion Engine Operation Manual
- Claas
- Grove
- New Holland
- Komatsu
- Kubota
- John Deere
- Linde
- Bomag
- CASE
- Clark
- JCB
- Jungheinrich
- Linde
- Yale
- Yanmar
- Manitou
- Manitowoc
- CNH
- Doosan
- Fiatagri
- Fiatallis
- Fiatallis Other Manual PDF
- Flexi Coil
- Ford New Holland
- Ford New Holland Other Manual PDF
- Huyndai
- Hypac
- Hyster
- Hyster Service Manual PDF
- Isuzu
- Kobelco
- Kohler
- Krupp
- Lombardini
- Mahindra
- Nuvera
- Perkins
- Sperry New Holland
- Utilev
- Versatile
- ZF