Hyster C210 (N30XMH) Service Manual
$30.00
- Type Of Manual: Service Manual
- Number of Pages: 746
- Size: 34.8MB
- Format: PDF
Description
- 1. _2
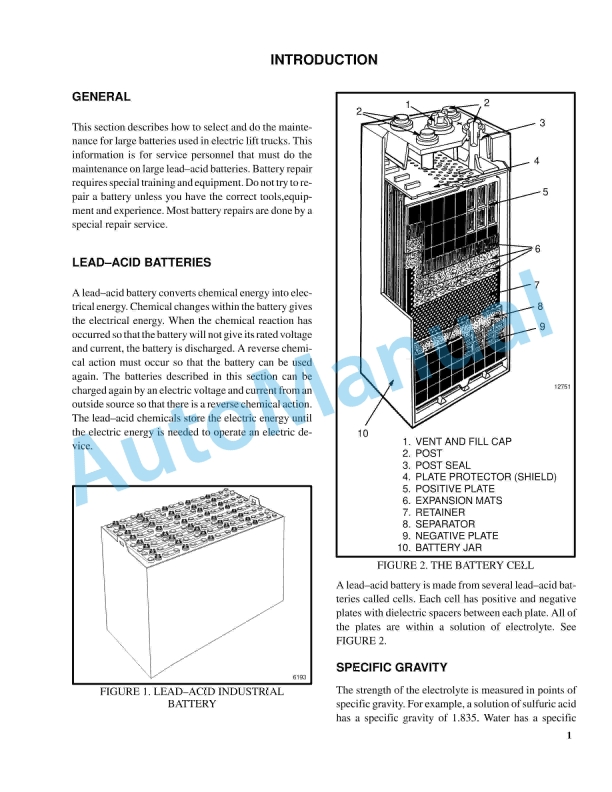
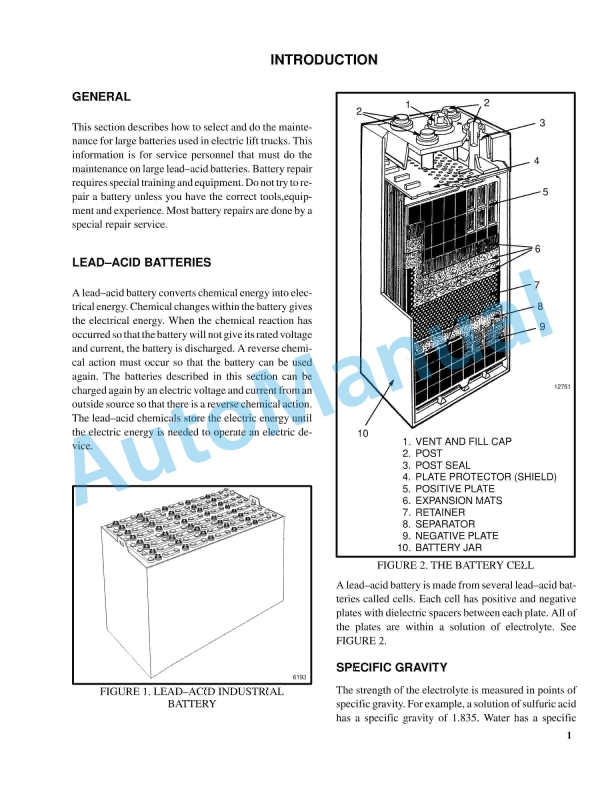
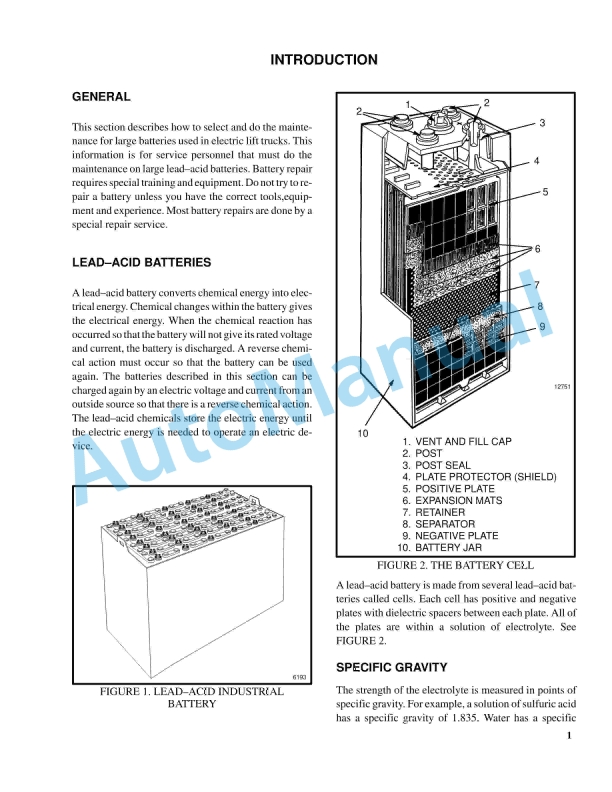
- 1.1. INTRODUCTION
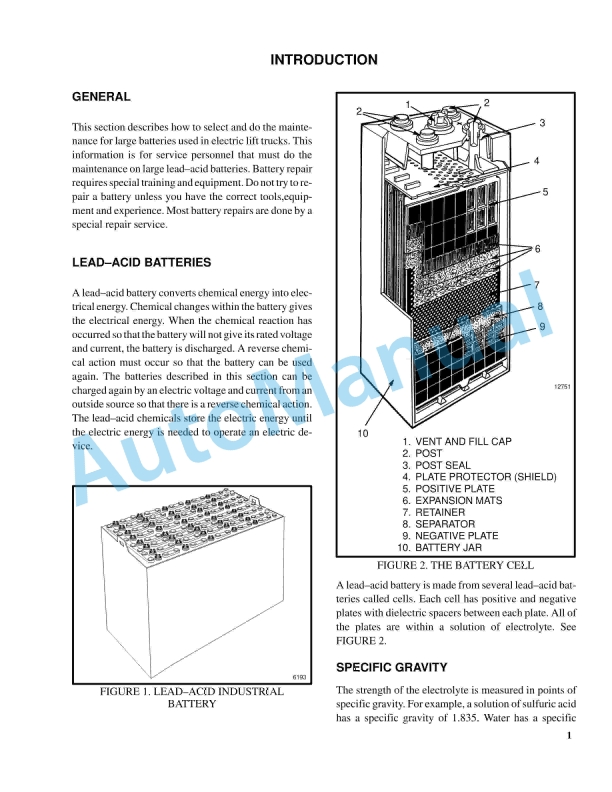
- 1.1.1. GENERAL
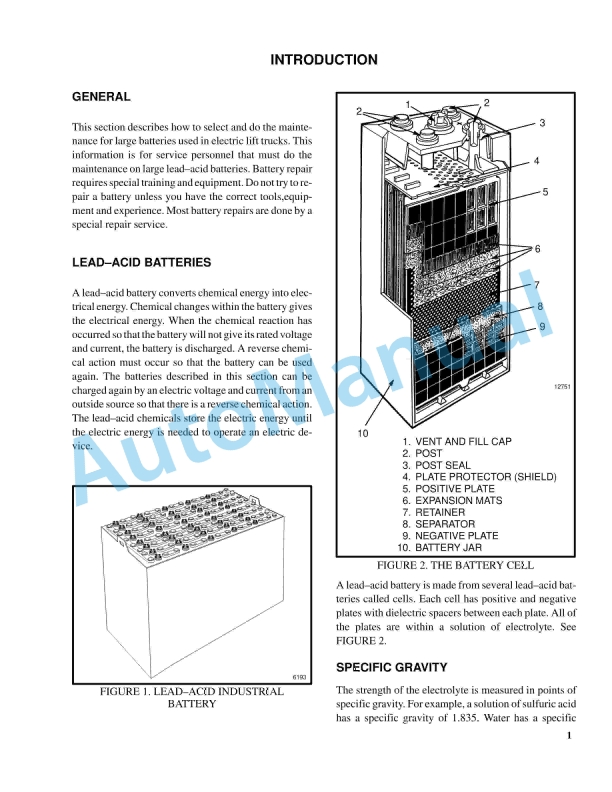
- 1.1.2. LEAD-ACID BATTERIES
- 1.1.3. SPECIFIC GRAVITY
- 1.1.4. THE CHEMICAL REACTION IN A CELL
- 1.2. ELECTRICAL TERMS
- 1.2.1. HOW TO SELECT THE BATTERY
- 1.2.2. VOLTAGE OF A BATTERY
- 1.2.3. THE BATTERY AS A COUNTERWEIGHT
- 1.2.4. BATTERY RATINGS
- 1.3. BATTERY MAINTENANCE
- 1.3.1. SAFETY PROCEDURES
- 1.3.2. MAINTENACE RECORDS
- 1.3.3. THE NEW BATTERY
- 1.3.4. HOW TO CLEAN THE BATTERY
- 1.3.5. HOW TO ADD WATER
- 1.3.6. THE HYDROMETER
- 1.3.7. BATTERY TEMPERATURE
- 1.3.8. CHARGING THE BATTERY
- 1.3.9. WHERE TO CHARGE THE BATTERIES
- 1.3.10. BATTERY CONNECTORS
- 1.3.11. BATTERY CARE
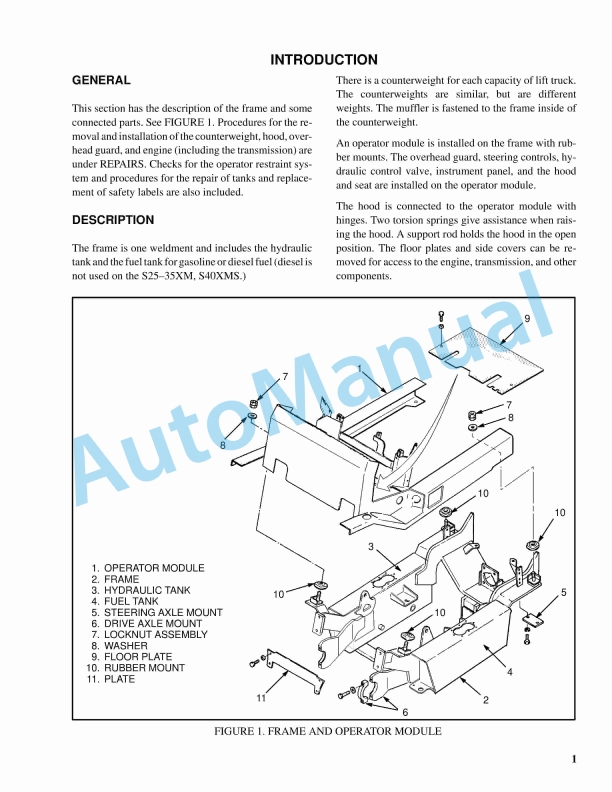
- 1.4. INTRODUCTION
- 1.4.1. GENERAL
- 1.4.2. DESCRIPTION
- 1.5. REPAIRS
- 1.5.1. OVERHEAD GUARD
- 1.5.2. BATTERY RESTRAINT AND SEAT ASSEMBLY
- 1.5.3. COUNTERWEIGHT
- 1.5.4. TRACTION MOTOR
- 1.5.5. HYDRAULIC TANK
- 1.5.6. PAINTING INSTRUCTIONS
- 1.5.7. LABEL REPLACEMENT
- 2. _2
- 2.1. DC Motor Maintenance
- 2.2. Safety Precautions Maintenance and Repair
- 2.3. General
- 2.4. Brush and Commutator Inspection
- 2.5. Hydraulic Pump Motor and Traction Motor
- 2.6. Steering Pump Motor
- 2.7. Normal Commutator Surface
- 2.8. Commutator Problems
- 2.9. Brush Replacement
- 2.10. Stoning the Commutator
- 2.11. Motors Repair
- 2.12. Disassemble
- 2.13. Traction Motor and Hydraulic Pump Motor
- 2.14. Steering Pump Motor
- 2.15. Assemble
- 2.16. Traction Motor and Hydraulic Pump Motor
- 2.17. Steering Pump Motor
- 2.18. Brush Alignment, Traction and Hydraulic Motors
- 2.19. Tests for Damaged Field and Armature
- 2.20. Test for an Open Circuit in Armature
- 2.21. Test for Short Circuit in One Armature Winding
- 2.22. Test for Short Circuit to Armature Shaft
- 2.23. Test for Open Circuit in Field Coil
- 2.24. Test for Short Circuit in Field Coil
- 2.25. Test for Short Circuit between Field and Motor Case
- 2.26. Brush Holder Test
- 2.27. Troubleshooting
- 2.28. Table 1. Normal Commutator Surfaces
- 2.29. Table 2. Commutator Problems
- 2.30. Table 3. Brush Wear Replacement Guide
- 3.
- 3.1. INTRODUCTION
- 3.1.1. GENERAL
- 3.1.2. DESCRIPTION
- 3.2. REPAIRS
- 3.2.1. REMOVAL OF THE DRIVE AXLE
- 3.2.2. CLEANING
- 3.2.3. INSPECTION
- 3.2.4. ASSEMBLY
- 3.2.5. INSTALLATION OF THE DRIVE AXLE ASSEMBLY
- 3.3. TROUBLESHOOTING
- 3.4. TORQUE SPECIFICATIONS
- 4.
- 4.1. INTRODUCTION
- 4.1.1. GENERAL
- 4.1.2. DESCRIPTION
- 4.2. REPAIRS
- 4.2.1. STEERING AXLE ASSEMBLY
- 4.2.2. SPINDLES, BEARINGS, AND TIE RODS
- 4.2.3. STEERING CYLINDER
- 4.3. TROUBLESHOOTING
- 4.4. TORQUE SPECIFICATIONS
- 5.
- 5.1. STEERING SYSTEM
- 5.1.1. GENERAL
- 5.1.2. DESCRIPTION
- 5.1.3. STEERING WHEEL AND COLUMN ASSEMBLY
- 5.2. POWER STEERING MOTOR AND PUMP
- 5.2.1. DESCRIPTION
- 5.2.2. REMOVAL AND DISASSEMBLY, E1.25-3.00XL (E25-60XL), J2.00-3.00XL (J40-60XL), E2.00-3.20XM (E45-65XM)
- 5.2.3. REMOVAL AND DISASSEMBLY, E3.50-5.50XL (E70-120XL, E70-120XL3)
- 5.2.4. REMOVAL AND DISASSEMBLY, J2.00-3.20XM (J40-65XM)
- 5.2.5. REMOVAL AND DISASSEMBLY, A1.00-1.50XL (A20-30XL)
- 5.2.6. REMOVAL AND DISASSEMBLY, E1.50-2.00XMS (E25-40XMS)
- 5.2.7. ASSEMBLY AND INSTALLATION All models with a verticle mount except the J2.00-3.20XM (J40-65M)
- 5.2.8. ASSEMBLY AND INSTALLATION, J2.00-3.20XM (J40-65XM)
- 5.2.9. ASSEMBLY AND INSTALLATION, E1.50-2.00XMS (E25-40XMS)
- 5.2.10. REPAIRS, POWER STEERING PUMP
- 5.3. HYDRAULIC STEERING MOTOR
- 5.3.1. DESCRIPTION
- 5.3.2. REPAIRS, HYDRAULIC STEERING MOTOR
- 5.4. CHECKS AND ADJUSTMENTS
- 5.4.1. AIR IN THE STEERING SYSTEM
- 5.4.2. CHECK STEERING PRESSURE
- 5.4.3. CHECK THE TENSION OF THE STEERING CHAIN (Units With MDU Only)
- 5.4.4. CHECK OPTIONAL ENCODER AND ACTIVATOR CIRCUITS
- 5.5. TROUBLESHOOTING
- 6.
- 6.1. INTRODUCTION
- 6.1.1. GENERAL
- 6.1.2. DESCRIPTION
- 6.1.3. OPERATION
- 6.2. REPAIRS
- 6.2.1. STEERING WHEEL AND COLUMN ASSEMBLY
- 6.3. CHECKS AND ADJUSTMENTS
- 6.3.1. REMOVE AIR FROM THE SYSTEM
- 6.4. TROUBLESHOOTING
- 7.
- 7.1. INTRODUCTION
- 7.1.1. GENERAL
- 7.1.2. DESCRIPTION AND OPERATION
- 7.2. REPAIRS
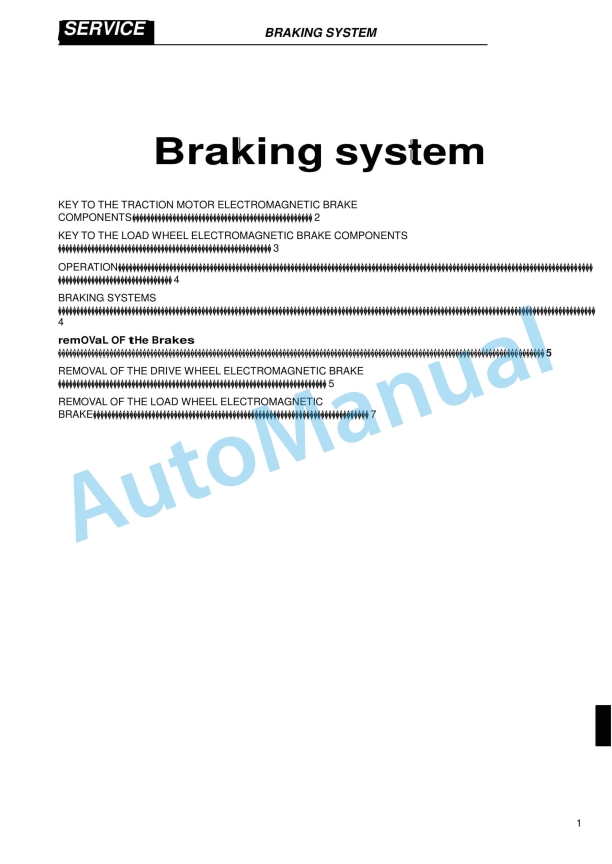
- 7.2.1. ELECTRIC BRAKE
- 7.2.2. BRAKE SWITCH
- 7.3. TROUBLESHOOTING
- 8.
- 8.1. INTRODUCTION
- 8.1.1. GENERAL
- 8.1.2. DESCRIPTION AND OPERATION
- 8.1.3. SERVICE BRAKES
- 8.1.4. PARKING BRAKE
- 8.1.5. MASTER CYLINDER
- 8.1.6. SEAT BRAKE ASSEMBLY
- 8.2. CHECKS AND ADJUSTMENTS
- 8.2.1. ADJUST THE SERVICE BRAKES
- 8.2.2. ADJUST THE BRAKE PEDAL
- 8.2.3. ADJUST THE MASTER CYLINDER
- 8.2.4. REMOVE THE AIR FROM THE BRAKE SYSTEM
- 8.2.5. TEST THE PARKING BRAKE NOT APPLIED WARNING
- 8.3. TROUBLESHOOTING
- 8.4. TORQUE SPECIFICATIONS
- 9.
- 9.1. INTRODUCTION
- 9.1.1. GENERAL
- 9.1.2. DESCRIPTION
- 9.1.3. OPERATION
- 9.2. REPAIRS
- 9.2.1. HYDRAULIC TANK
- 9.2.2. FILTER REPLACEMENT
- 9.2.3. HYDRAULIC PUMP
- 9.2.4. MAIN CONTROL VALVE
- 9.2.5. STEERING PUMP
- 9.2.6. ROTARY ACTUATOR VALVE
- 9.2.7. STEERING CONTROL UNIT
- 9.2.8. STEERING CYLINDER
- 9.3. CHECKS AND ADJUSTMENTS
- 9.3.1. MAIN CONTROL VALVE
- 9.3.2. STEERING RELIEF VALVE
- 9.4. TROUBLESHOOTING CHART
- 9.5. SPECIFICATIONS
- 10.
- 10.1. INTRODUCTION
- 10.1.1. GENERAL
- 10.1.2. DESCRIPTION
- 10.1.3. OPERATION
- 10.1.4. Lift Section (See FIGURE 3.)
- 10.1.5. Auxiliary Section
- 10.1.6. Relief Valve (See FIGURE 5.)
- 10.2. REPAIRS
- 10.2.1. MAIN CONTROL VALVE
- 10.2.2. Removal (See FIGURE 8. And FIGURE 9.)
- 10.2.3. Disassembly (See FIGURE 6.)
- 10.2.4. Cleaning And Inspection
- 10.2.5. Assembly (See FIGURE 6.)
- 10.2.6. Installation, (See FIGURE 7. And FIGURE 8.)
- 10.2.7. CONTROL LEVER LINKAGE
- 10.2.8. Removal (See FIGURE 9.)
- 10.2.9. Disassembly (See FIGURE 9.)
- 10.2.10. Assembly And Installation (See FIGURE 9.)
- 10.2.11. CONTROL VALVE LINKAGE
- 10.2.12. Removal And Disassembly (See FIGURE 10.)
- 10.2.13. Assembly And Installation (See FIGURE 10.)
- 10.3. CHECKS AND ADJUSTMENTS
- 10.3.1. PRESSURE RELIEF VALVES
- 10.3.2. Primary Relief Valve (See FIGURE 12.)
- 10.3.3. Secondary Relief Valve (See FIGURE 12.)
- 10.4. TROUBLESHOOTING
- 10.5. TROUBLESHOOTING
- 11.
- 12.
- 12.1. INTRODUCTION
- 12.1.1. GENERAL
- 12.2. DESCRIPTION
- 12.2.1. GENERAL
- 12.2.2. STEERING COLUMN GAUGES, METERS AND INDICATORS
- 12.2.3. LED DISPLAY PANEL
- 12.2.4. LX SERIES DISPLAY PANEL
- 12.2.5. ZX SERIES DISPLAY PANELS
- 12.3. CHECKS AND ADJUSTMENTS
- 12.3.1. GENERAL
- 12.4. REPLACEMENT
- 12.4.1. GENERAL
- 12.4.2. METER REPLACEMENT
- 12.4.3. SENDER REPLACEMENT
- 12.4.4. DISPLAY PANEL
- 12.4.5. DISPLAY PANELS FOR THE EV – 100/200ZX MOTOR CONTROLLERS, COLUMN MOUNT
- 12.4.6. DISPLAY PANELS FOR THE EV-100/200ZX MOTOR CONTROLLERS, DASH MOUNT
- 12.5. SPECIFICATIONS
- 12.6. TROUBLESHOOTING
- 13.
- 14.
- 14.1. Electrical System
- 14.2. Safety Precautions Maintenance and Repair
- 14.3. General
- 14.4. Description
- 14.5. ZX Series Display Panels
- 14.6. Display Panel
- 14.7. Basic Display Panels
- 14.8. Performance Display
- 14.9. Brush Wear Indicators
- 14.10. SEM Display Panels – Features
- 14.11. Descriptions of Common Features
- 14.12. Additional Features of Premium Display Panel
- 14.13. Descriptions of Additional Features
- 14.14. SEM Display Panel Indicators
- 14.15. All Indicator Symbols
- 14.16. Hourmeter Indicator Symbol
- 14.17. Wrench Indicator Symbol
- 14.18. Battery Indicator Symbol
- 14.19. Battery State-of-Charge (BDI)
- 14.20. Brake Fluid Too Low Symbol
- 14.21. Parking Brake Symbol
- 14.22. Fasten Seat Belt Symbol
- 14.23. LCD Screen (Standard Display Panel)
- 14.24. Additional Components of Premium Display Panel
- 14.25. Alpha Numerical Screen
- 14.26. STAR Push Button
- 14.27. Push Buttons 1 Through 5 – SEM
- 14.28. Other Control Components
- 14.29. Display Panel Components Replacement
- 14.30. ZX Panel Replacement
- 14.31. Display Panel Assembly
- 14.32. Key Switch, Replace
- 14.33. Indicator LEDs
- 14.34. Battery Indicators
- 14.35. Digital Display (Performance Display Panel Only)
- 14.36. Status Code or Performance Level Switches and Indicator LEDs (Pe
- 14.37. Basic Display Panel, Replace Parts
- 14.38. Performance Display Panel, Replace Parts
- 14.39. SEM Display Panel Replacement
- 14.40. Motor Controller (SR or SP) Replacement
- 14.41. Control Components Replacement
- 14.42. Start Switch, Replace
- 14.43. Brake Light Switch, Replace
- 14.44. Seat Switch, Replace
- 14.45. External Seat Switch, Adjust
- 14.46. Switch for Optional Seat Brake, Replace
- 14.47. Parking Brake Switch, Replace
- 14.48. Direction Switches (MONOTROL Pedal), Replace
- 14.49. Direction Control Switches (Steering Column), Replace
- 14.50. Direction Control Switches, E70-120XL 3 (Steering Column)
- 14.51. Brake Fluid Switch, Replace
- 14.52. Brush Wear and Overtemperature Sensors
- 14.53. Rocker Switches for Lights
- 14.54. Accelerator Position Sensor, Replace
- 14.55. On-Demand Steering Components
- 14.56. Lights, Converter, Relay, and Reverse Alarm
- 14.57. Brake, Tail, and Reverse Light Assembly, Replace
- 14.58. Flashing Light Assembly, Replace
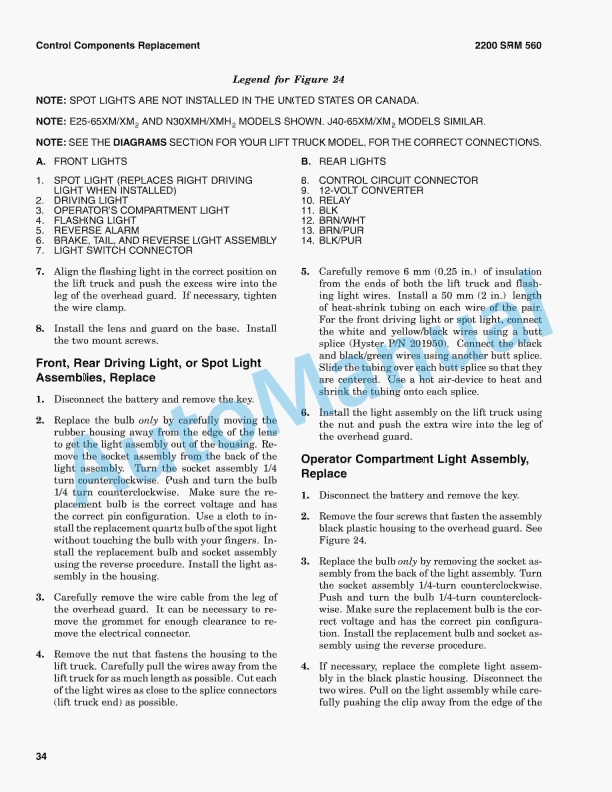
- 14.59. Front, Rear Driving Light, or Spot Light Assemblies, Replace
- 14.60. Operator Compartment Light Assembly, Replace
- 14.61. Converter, Replace
- 14.62. Relay, Replace
- 14.63. Reverse Alarm, Replace
- 14.64. Horn and Horn Button
- 14.65. Horn Switch and Cover
- 14.66. Hydraulic Pump Switches
- 14.67. Control and Power Fuses Check
- 14.68. Brush Wear and Overtemperature Sensors Check – ZX
- 14.69. Thermal Sensors – SEM Check
- 14.70. Start Switch Adjustment
- 14.71. Accelerator Potentiometer and Start Switch E70-120XL, E70-120XL
- 14.72. E70-120XL
- 14.73. E70-120XL 3
- 14.74. Direction Switches (MONOTROL)
- 14.75. Brake Light Switch Adjustment
- 14.76. Seat Switch Check
- 14.77. Optional Seat Brake Switch Adjustment
- 14.78. Parking Brake Switch Adjustment
- 14.79. Direction Switches Check
- 14.80. Monotrol Pedal
- 14.81. Steering Column
- 14.82. Hydraulic Pump Switch Adjustment
- 14.83. MONOTROL or Accelerator Pedal Adjustment
- 14.84. Accelerator Position Sensor Adjustment
- 15.
- 16.
- 17.
- 17.1. INTRODUCTION
- 17.1.1. GENERAL
- 17.1.2. MAST WELDMENTS
- 17.1.3. CARRIAGES
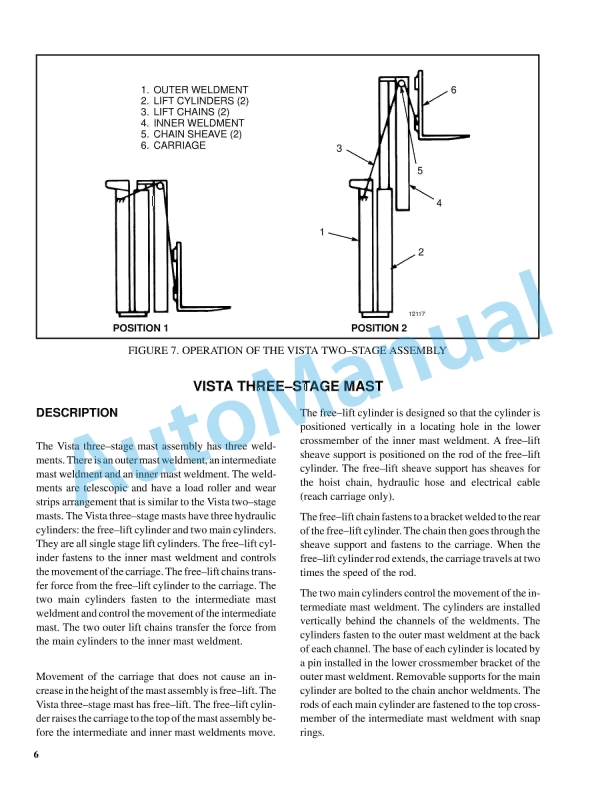
- 17.2. VISTA TWO-STAGE MAST
- 17.2.1. DESCRIPTION
- 17.2.2. OPERATION
- 17.3. VISTA THREE-STAGE MAST
- 17.3.1. DESCRIPTION
- 17.3.2. OPERATION
- 18.
- 18.1. INTRODUCTION
- 18.1.1. GENERAL
- 18.1.2. DESCRIPTION
- 18.2. REPAIRS
- 18.2.1. MAIN CYLINDER – DISASSEMBLY
- 18.2.2. MAIN CYLINDER – ASSEMBLY
- 18.2.3. FREE-LIFT CYLINDER – DISASSEMBLY
- 18.2.4. FREE-LIFT CYLINDER – ASSEMBLY
- 18.3. TROUBLESHOOTING
- 19.
- 19.1. INTRODUCTION
- 19.1.1. General
- 19.2. SAFETY PROCEDURES
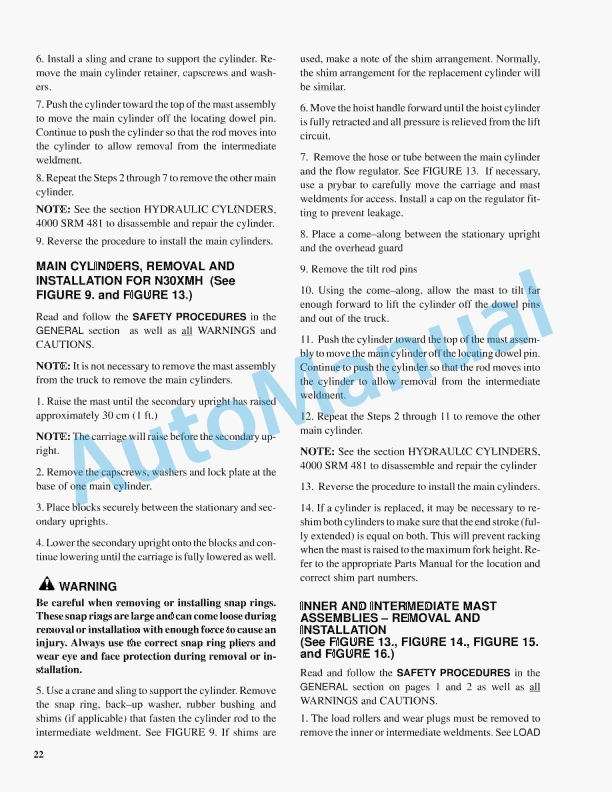
- 19.3. LOAD BACKREST EXTENSION, CARRIAGE, LOAD ROLLERS, SIDE ROLLERS AND FORKS
- 19.3.1. Load Backrest Extension – Removal And Installation
- 19.3.2. Carriage Assembly – Removal And Installation
- 19.3.3. Carriage Load Rollers – Removal And Installation
- 19.3.4. Side Rollers – Disassembly And Assembly
- 19.3.5. Fork Replacement
- 19.4. TWO-STAGE MAST ASSEMBLY
- 19.4.1. Two-Stage Mast Assembly – Removal
- 19.4.2. Cleaning And Inspection
- 19.4.3. Lift Cylinders – Removal And Installation
- 19.4.4. Inner Mast Assembly – Removal And Installation
- 19.4.5. Hoses – Replace
- 19.4.6. Hoses And Cable Sheaves – Replace
- 19.4.7. Two-Stage Lift Chains
- 19.4.8. Two-Stage Chain Sheave – Removal And Installation
- 19.4.9. Load Rollers And Wear Plugs – Removal And Installation
- 19.4.10. Two-Stage Mast Assembly – Installation
- 19.5. THREE-STAGE MAST ASSEMBLY
- 19.5.1. Three-Stage Mast Assembly – Removal
- 19.5.2. Cleaning And Inspection
- 19.5.3. Free-Lift Cylinder – Removal And Installation
- 19.5.4. Inner And Intermediate Mast Assemblies – Removal And Installation
- 19.5.5. Hoses – Replace
- 19.5.6. Hose And Cable Sheaves – Replace
- 19.5.7. Three-Stage Lift Chains – Removal And Installation
- 19.5.8. Three-Stage Chain Sheaves – Diassembly And Assembly
- 19.5.9. Load Rollers And Wear Plugs – Removal And Installation
- 19.5.10. Three-Stage Mast Assembly – Installation
- 19.6. CHECKS AND ADJUSTMENTS
- 19.6.1. Check The Operation Of The Mast
- 19.6.2. Check For Leaks In The Hydraulic System
- 19.6.3. Check Lift Chains
- 19.6.4. Mast Adjustments
- 19.6.5. Carriage Adjustments
- 20.
- 20.1. INTRODUCTION
- 20.1.1. GENERAL
- 20.1.2. DESCRIPTION
- 20.1.3. ATTACHMENT REMOVAL
- 20.1.4. DISASSEMBLY
- 20.1.5. ASSEMBLY
- 20.2. CHECKS AND ADJUSTMENTS
- 20.2.1. THRUST ROLLERS ON THE SIDE SHIFT CARRIAGE
- 20.2.2. THRUST ROLLERS ON THE BOOM
- 20.2.3. LOAD ROLLERS ON THE BOOM
- 20.2.4. TRAVERSE CHAIN ADJUSTMENT
- 20.3. TROUBLESHOOTING
- 20.3.1. SPECIFICATIONS

%20Service%20Manual&url=https://pdfrepairmanual.com/docs/hyster-c210-n30xmh-service-manual/&media=https://pdfrepairmanual.com/wp-content/uploads/2026/01/hyster-c210-n30xmh-service-manual-1.jpg)
%20Service%20Manual&url=https://pdfrepairmanual.com/docs/hyster-c010-s1-50-2-00xms-service-manual/&media=https://pdfrepairmanual.com/wp-content/uploads/2026/01/hyster-c010-s150-200xms-service-manual-1.jpg)
%20Service%20Manual&url=https://pdfrepairmanual.com/docs/hyster-a406-r1-4-r1-6-service-manual/&media=https://pdfrepairmanual.com/wp-content/uploads/2026/01/hyster-a406-r14-r16-service-manual-1.jpg)
%20Service%20Manual&url=https://pdfrepairmanual.com/docs/hyster-b168-j2-00-3-00xl-service-manual/&media=https://pdfrepairmanual.com/wp-content/uploads/2026/01/hyster-b168-j200-300xl-service-manual-1.jpg)
%20Service%20Manual&url=https://pdfrepairmanual.com/docs/hyster-b160-j25-35bs-service-manual/&media=https://pdfrepairmanual.com/wp-content/uploads/2026/01/hyster-b160-j25-35bs-service-manual-1.jpg)
%20Service%20Manual&url=https://pdfrepairmanual.com/docs/hyster-b210-n30ah-service-manual/&media=https://pdfrepairmanual.com/wp-content/uploads/2026/01/hyster-b210-n30ah-service-manual-1.jpg)

%20Service%20Manual&url=https://pdfrepairmanual.com/docs/hyster-b447-s1-0c-s1-2c-s1-5c-service-manual/&media=https://pdfrepairmanual.com/wp-content/uploads/2026/01/hyster-b447-s10c-s12c-s15c-service-manual-1.jpg)
%20Service%20Manual&url=https://pdfrepairmanual.com/docs/hyster-c004-s3-00-5-50e-service-manual/&media=https://pdfrepairmanual.com/wp-content/uploads/2026/01/hyster-c004-s300-550e-service-manual-1.jpg)
%20Service%20Manual&url=https://pdfrepairmanual.com/docs/hyster-c002-s30-50c-service-manual/&media=https://pdfrepairmanual.com/wp-content/uploads/2026/01/hyster-c002-s30-50c-service-manual-1.jpg)
%20Service%20Manual&url=https://pdfrepairmanual.com/docs/hyster-b174-r30es-service-manual/&media=https://pdfrepairmanual.com/wp-content/uploads/2026/01/hyster-b174-r30es-service-manual-1.jpg)
There are no reviews yet.