
Description
-
Model List:
- E14 EX 2G
- E16 EX 2G
- E18 EX 2G
- E20 EX 2G
- 1. Electric forklift truckE1420 02 EX
- 1.1. Table of content
- 1.2. Introduction
- 1.2.1. Your industrial truck
- 1.2.2. Intended use
- 1.2.3. Impermissible use
- 1.2.4. Basic information on explosion protection
- 1.2.5. Description of use and climatic conditions
- 1.2.6. Symbols used
- 1.2.7. Technical description
- 1.2.8. Receiving the industrial truck
- 1.2.9. Legal requirements for marketing
- 1.2.10. Disposing of components and batteries
- 1.3. Safety
- 1.3.1. Safety guidelines
- 1.3.2. Residual risks
- 1.3.3. Stability
- 1.3.4. In the case of tipover
- 1.3.5. Handling consumables
- 1.3.6. Qualified person
- 1.3.7. Periodic safety inspection
- 1.3.8. Fitting attachments
- 1.3.9. Emergency exit with attached rear window
- 1.3.10. Emergency lowering
- 1.3.11. Towing
- 1.4. Overview
- 1.4.1. Nameplate.adhesive label
- 1.4.2. Nameplate
- 1.4.3. Truck configuration
- 1.4.4. Truck overview
- 1.4.5. Operating devices
- 1.4.6. Display unit
- 1.4.7. Switch panel
- 1.5. Operation
- 1.5.1. Service plan before initial commissioning
- 1.5.2. Instructions for runningin
- 1.5.3. Preshift checks
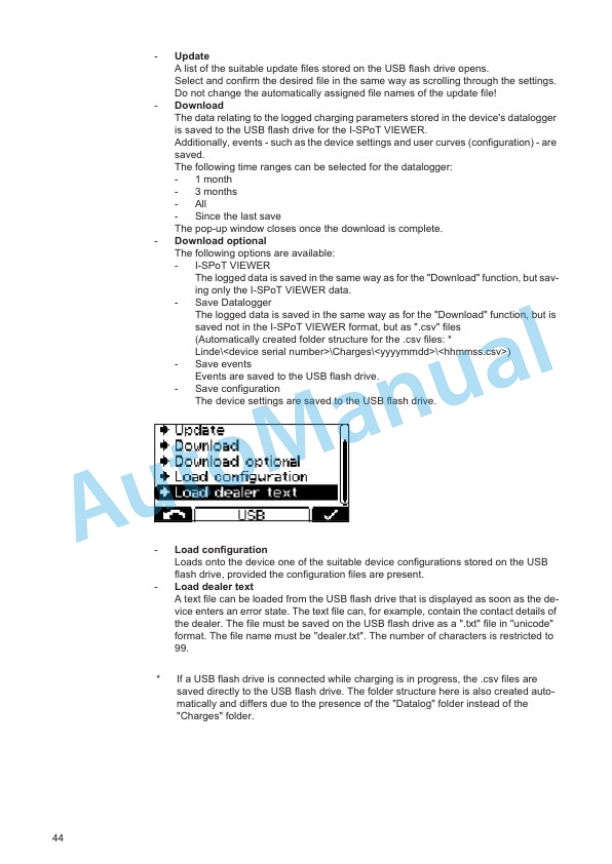
- 1.5.4. Regular maintenance
- 1.5.5. Drivers compartment
- 1.5.5.1. Entering and exitingthe truck
- 1.5.5.2. Adjusting the drivers seat
- 1.5.5.3. Adjusting the drivers seat armrest
- 1.5.5.4. Adjusting the steering column
- 1.5.5.5. Seat belt
- 1.5.5.6. Horn
- 1.5.5.7. Lighting
- 1.5.5.8. Windscreen wipers
- 1.5.5.9. Heating system
- 1.5.5.10. Buckle monitoring on seat belt
- 1.5.5.11. Overhead guard with optimised visibility
- 1.5.6. Operation
- 1.5.6.1. Switching the truck on and off
- 1.5.6.2. Access system connect (LFM)
- 1.5.6.3. Emergency off switch
- 1.5.6.4. Driving (singlepedal operation)
- 1.5.6.5. Driving (dual pedal operation)
- 1.5.6.6. Adjusting the time
- 1.5.6.7. Steering system
- 1.5.6.8. Brake system
- 1.5.6.9. Turn indicator
- 1.5.6.10. Joystick Central lever operation
- 1.5.6.11. Joystick Single lever operation
- 1.5.6.12. Depressurisation
- 1.5.6.13. Driving speed reduction via a switch
- 1.5.6.14. Lifting system and attachments single lever operationwith 3rd auxiliary hydraulics
- 1.5.7. Working with a load
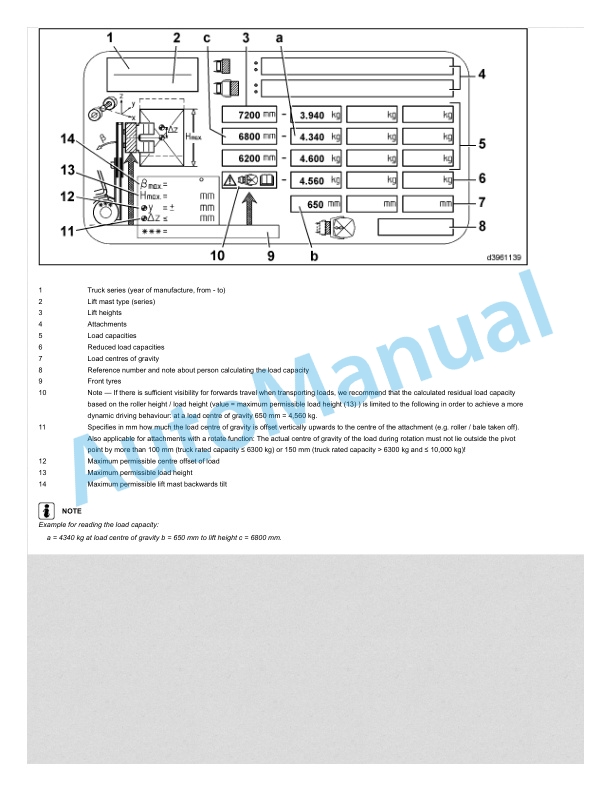
- 1.5.7.1. Load capacity diagram
- 1.5.7.2. Adjusting the fork arm distance
- 1.5.7.3. Picking up a load
- 1.5.7.4. Driving under load
- 1.5.7.5. Setting down loads
- 1.5.7.6. Mast positioning
- 1.5.7.7. Lift height limitation
- 1.5.7.8. Steering angle display
- 1.5.7.9. Towing device
- 1.5.8. Before exiting the truck
- 1.5.9. Drive batteries
- 1.5.9.1. Checking the battery charge status
- 1.5.9.2. Battery hoodOpening closing
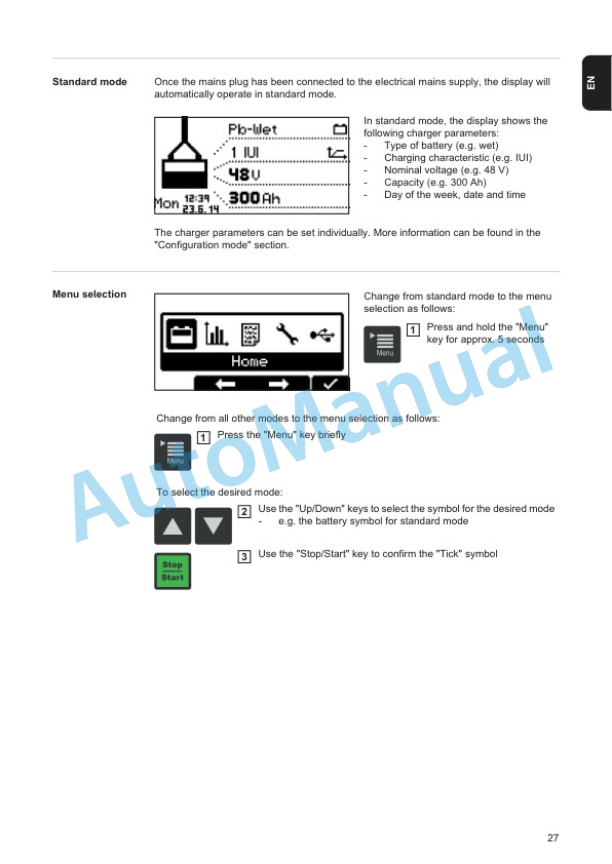
- 1.5.9.3. Charging the battery
- 1.5.9.4. Replacing the battery
- 1.5.10. Loading.transporting
- 1.5.10.1. Removing.attaching the lift mast
- 1.5.10.2. Driving without the lift mast
- 1.5.10.3. Crane loading
- 1.5.10.4. Transporting the truck using a lorry or flatbed trailer
- 1.6. Servicing
- 1.6.1. Safety information for service work Regular Service
- 1.6.1.1. Safety information regarding servicing work
- 1.6.1.2. General information
- 1.6.1.3. General information.cleaning
- 1.6.2. Inspection and maintenance data
- 1.6.3. Recommendations for consumables
- 1.6.4. Service plan
- 1.6.4.1. Service plan
- 1.6.4.2. Additional service plan for explosion protection
- 1.6.5. Gearbox
- 1.6.5.1. Planetary transmissionChecking the oil level
- 1.6.5.2. Checking the planetary transmission for leaks
- 1.6.6. Chassis, bodywork and fittings
- 1.6.6.1. Cleaning the truck
- 1.6.6.2. Cleaning plastic surfaces
- 1.6.6.3. Checking and lubricating the bearing points and joints
- 1.6.6.4. Lubricating the bolts, hinges and interlocks on the battery door
- 1.6.6.5. Battery door and battery hoodChecking and adjusting the interlock
- 1.6.6.6. Checking that the battery is secured in the battery compartment
- 1.6.6.7. Checking the condition and function of the seat belt
- 1.6.7. Chassis frame
- 1.6.7.1. Checking the tyres
- 1.6.7.2. Changing wheels
- 1.6.7.3. Tightening the wheel fastenings
- 1.6.7.4. Checking the wheels for damage, foreign objects and wear
- 1.6.7.5. Cleaning the turntable steering axle
- 1.6.7.6. Lubricating the combined axle
- 1.6.8. Operating devices
- 1.6.8.1. Testing the brake system
- 1.6.8.2. Checking and lubricating the pedal group and linkage
- 1.6.8.3. Check bellows on joystick
- 1.6.8.4. Checking the horn for correct function
- 1.6.9. Electrics.electronics
- 1.6.9.1. Checking the condition and secure attachment of electric lines, cable connectors, cable connections and explosionprotected screw joints
- 1.6.9.2. Checking the heat sinks of the drive axle for contamination and cleaning them if necessary
- 1.6.9.3. Checking the main contactor (switchon contactor)
- 1.6.9.4. Cleaning the fans Checking for correct operation
- 1.6.10. Hydraulics
- 1.6.10.1. Working and steering hydraulics Checking the oil level
- 1.6.10.2. Hydraulic systemChecking for leak tightness
- 1.6.10.3. Checking that the bleeder valve on the hydraulic tank is functioning correctly
- 1.6.10.4. Hose linesChecking the preload
- 1.6.10.5. Checking the control unit for correct function
- 1.6.10.6. Tilt cylinder bearings Checking for wear
- 1.6.11. Load lift system
- 1.6.11.1. Working on the lift mast and at the front of the truck
- 1.6.11.2. Checking the condition of the lift mast
- 1.6.11.3. Cleaning and spraying the lift mast chain
- 1.6.11.4. Lift mast adjusting the chain
- 1.6.11.5. Checking the fork arms and arm safety devices
- 1.6.11.6. Checking the hose carrier
- 1.6.11.7. Cleaning and lubricating the sideshift (special equipment), checking thefastening
- 1.6.11.8. Cleaning and lubricating the fork prong positioner (special equipment) and checking the mounting
- 1.6.11.9. Checking the slide guides on the sideshift (special equipment) for wear
- 1.6.12. Selfhelp
- 1.6.12.1. Fuses for basic equipment
- 1.6.12.2. Fuses for special equipment
- 1.6.12.3. Diagnostic connector
- 1.6.12.4. Malfunctions during operation
- 1.6.12.5. Malfunctions, causes and remedies Hydraulic system
- 1.6.13. Switching off
- 1.6.13.1. Decommissioning the industrial truck
- 1.6.13.2. Disposal of old trucks
- 1.7. Technical data
- 1.7.1. Overview of dimensions
- 1.7.2. Lift mast data for model 181
- 1.7.3. E 1402 Ex type sheet, as at 08.2014
- 1.7.4. E 1602 Ex type sheet, as at 08.2014
- 1.7.5. E 16P02 Ex type sheet, as at 08.2014
- 1.7.6. E 16L02 Ex type sheet, as at 08.2014
- 1.7.7. E 20L02 Ex type sheet, as at 08.2014
- 1.7.8. E 20PL02 Ex type sheet, as at 08.2014
- 1.7.9. Load capacity diagrams
- 1.7.10. Additional capacity rating plate for attachments
- 1.7.11. Noise emission values
- 1.7.12. Vibration characteristics for bodily vibrations
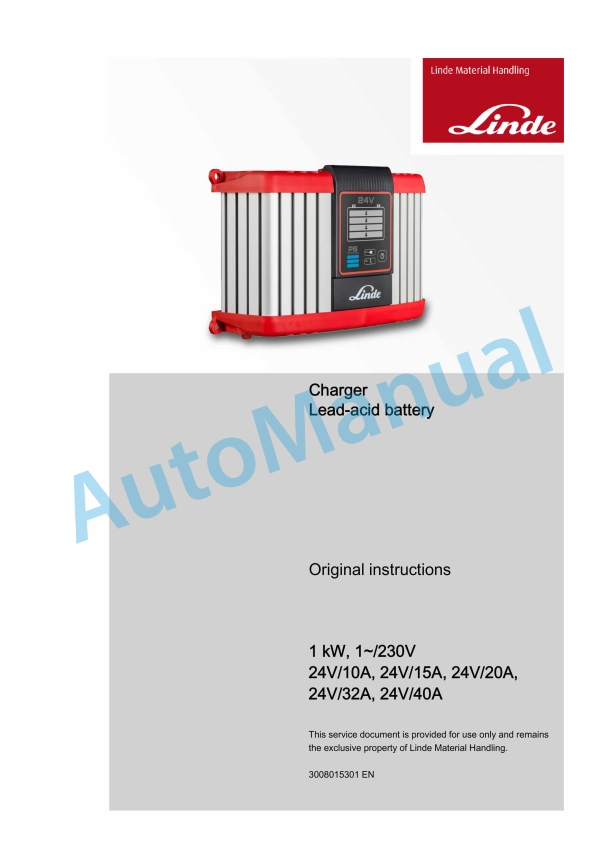
- 2. Leadacid battery charger 24V . 48V
- 3. Leadacid battery charger 24V . 48V . 80V


There are no reviews yet.