
Description
-
Model List:
- EB3100 Diesel Tractor
- 1. INTRODUCTION
- 1.1. Welcome to the World of Yanmar Tractor
- 2. PICTOGRAPHS
- 3. SAFETY PRECAUTIONS
- 3.1. About The Operators Manual
- 3.2. Safety Alert Symbol
- 3.3. Precautions Before Operating The Tractor
- 3.4. Safe Practices for Operating the Tractor
- 3.4.1. Start the Tractor
- 3.4.2. Work with the Tractor
- 3.4.3. Stop the Tractor
- 3.4.4. Considerations for Safety of a Child
- 3.5. Operate the Tractor on Slopes
- 3.6. Travel on a Road
- 3.7. Safe Practices for Parking the Tractor
- 3.8. Operate the Power Take Off (PTO)
- 3.9. Use the 3-Point Hitch
- 3.10. Roll-Over Protective Structure (ROPS) Precautions
- 3.11. Safe Practices for Servicing the Tractor
- 3.12. Replace the rubber product/s such as Hydraulic Hose, Fuel Hoses, Power Steering Hoses, Radiator Hoses and Air Intake Hoses for Every 2 Years
- 3.13. This tractor is not designed for forest industry, quarry or mining use
- 3.14. Safe Operation of Implements and Attachments
- 3.15. Understand the Tractor Safety Decals
- 3.15.1. Safety Alert Symbol
- 3.15.2. Care of DANGER, WARNING and CAUTION Decals
- 4. SERVICE THE TRACTOR
- 5. SPECIFICATIONS
- 5.1. Specifications Table
- 5.2. Traveling Speeds
- 6. IMPLEMENT CAPACITIES
- 7. NAMES AND FUNCTIONS OF COMPONENTS
- 7.1. Overview
- 7.1.1. Names of Main Components
- 7.1.2. Functions of Main Components
- 7.2. Operator Station Controls
- 7.2.1. Names of Components
- 7.2.2. Function of Components
- 7.3. Instrument Panel
- 8. PRE-OPERATION CHECK
- 8.1. Pre-Operation Check
- 8.2. Precautions Before Operation
- 8.3. Routine Checks
- 8.4. Prevent Damage to Plastic Surfaces and Painted Surfaces
- 9. OPERATE THE ENGINE
- 9.1. Start the Engine
- 9.2. Start the Engine in Cold Weather
- 9.3. Shut Off the Engine
- 9.4. Restart a Stalled Engine
- 9.5. Start When the Engine Runs Out of Fuel
- 10. OPERATE THE TRACTOR
- 10.1. Accident Hazard
- 10.2. Operate a New Tractor
- 10.2.1. Always run the tractor at less than full speed during the first 50 hours of operation
- 10.2.2. Change the lubricating oil for the new tractor
- 10.3. Raise and Lower the Roll-Over Protective Structure (ROPS)
- 10.3.1. Lower (folded down) the Roll-Over Protective Structure (ROPS)
- 10.3.2. Raise (unfolded up) the Roll-Over Protective Structure (ROPS)
- 10.4. Operate the Tractor
- 10.4.1. Turn Signals
- 10.4.2. Light Control/Hazard Lights Button Switch
- 10.4.3. Warm Up Transmission Hydraulic Oil in a Cold Weather Situation
- 10.4.4. Range Gear Lever
- 10.4.5. D/4WD Lever
- 10.4.6. Tips on the 4-Wheel Drive
- 10.4.7. Point Hitch Control Lever
- 10.4.8. Throttle Control Lever
- 10.4.9. Drive Pedals
- 10.4.10. Engage the Cruise Control
- 10.4.11. Disengage the Cruise Control
- 10.5. Stop the Tractor
- 10.5.1. Stopping Procedure
- 10.5.2. Stop in an Emergency
- 10.6. Use the Brake
- 10.6.1. Engage the Parking Brake
- 10.6.2. Disengage the Parking Brake
- 10.6.3. Use the Brake Pedals as Driving Brake (On Roads)
- 10.6.4. Use the Brake Pedals for Easier Turning
- 10.7. Practices for Safe Operation
- 10.7.1. Differential Lock
- 10.7.2. Drive the Tractor on Roads
- 10.7.3. Push or Tow the Tractor
- 10.7.4. Allowable Loads When Towing with the Tractor
- 10.7.5. Transport the Tractor on a Trailer
- 10.7.6. Operate on Slopes and Rough Terrain
- 10.7.7. Uphill and Downhill Slopes
- 10.7.8. Steep Downhill Slope
- 10.7.9. About the Power Steering
- 11. POWER TAKE OFF (PTO) SYSTEM
- 11.1. Operate the Power Take Off (PTO) System
- 11.1.1. Determine the Appropriate Power Take Off (PTO) Speed
- 11.1.2. Engage Power Take Off (PTO) (with the operator on the operator seat)
- 11.1.3. Engage the Rear Power Take Off (PTO) (with the operator out of the operator seat
- 11.1.4. Disengage Power Take Off (PTO) (with the operator on the operator seat)
- 11.2. Use the Power Take Off (PTO) Safely
- 11.2.1. Use the Power Take Off (PTO) Shaft Cap
- 11.3. Install an Implement to the Power Take Off (PTO) Driveline
- 12. POINT HITCH AND DRAWBAR
- 12.1. Point Hitch
- 12.1.1. Use the 3-Point Hitch Control Lever
- 12.1.2. Use the Position Stop Knob
- 12.1.3. Hydraulic Flow Control/Stop Knob
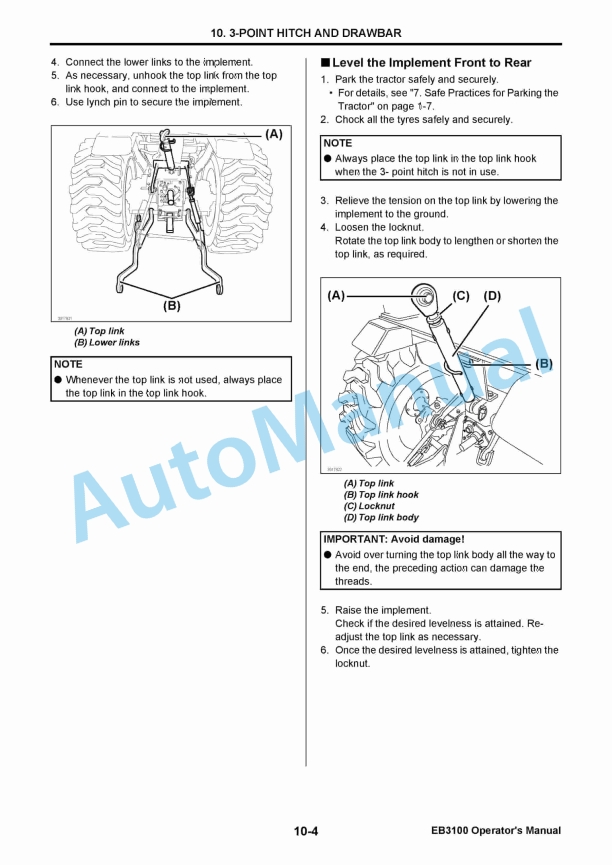
- 12.1.4. Use the Lower Links (and Top Link as Needed)
- 12.1.5. Level the Implement Front to Rear
- 12.1.6. Level the Implement Side to Side
- 12.1.7. Adjust the Stabilizer
- 12.2. Drawbar
- 12.2.1. Maximum Drawbar Loads
- 12.2.2. Deploy/Stow the Drawbar
- 12.2.3. Remove Drawbar
- 12.3. Use the Safety Chain
- 13. HYDRAULIC SYSTEM
- 13.1. point Hitch Control System
- 13.1.1. Use the 3-Point Hitch Control Lever
- 13.1.2. Use the Position Stop Knob
- 13.1.3. Hydraulic Flow Control/Stop Knob
- 13.2. Operate the Implement Control Valve
- 13.2.1. Implement Control Lever
- 13.2.2. Implement Control Lever Lock
- 13.2.3. Connect the Implement Hydraulic Hoses
- 13.2.4. Disable the Regen Function of the Implement Control Valve
- 14. TYRES, WHEELS AND WEIGHT
- 14.1. Adjust the Wheel
- 14.1.1. Check the Wheel Bolt Tightening Torque
- 14.1.2. Select the Front Tyre Rolling Direction
- 14.1.3. Change the Tyre Tread Width
- 14.2. Remove/Install the Wheels
- 14.3. Weight (Option)
- 14.3.1. Select the Appropriate Amount of Front Weight
- 14.3.2. Front Weights (option)
- 14.3.3. Select the Appropriate Amount of Rear Weight
- 14.3.4. Use the Optional Rear Wheel Weights
- 14.3.5. Use the Optional Rear Ballast
- 14.3.6. Use Liquid Weight for the Tyres
- 15. MAINTENANCE
- 15.1. Maintenance Check List
- 15.2. Diesel Fuel Specifications
- 15.3. Lubricants
- 15.4. Replacement Parts
- 15.4.1. Technical Document
- 16. PERIODIC SERVICE
- 16.1. Explosion Hazard
- 16.2. n Service the Tractor
- 16.3. n Warranty and Repair of the Engine
- 16.3.1. NEVER inhale the engine exhaust gas.
- 16.4. Open/Close the Hood
- 16.4.1. Open the Hood
- 16.4.2. Close the Hood
- 16.5. Daily Checks
- 16.5.1. Check the Engine Oil Level
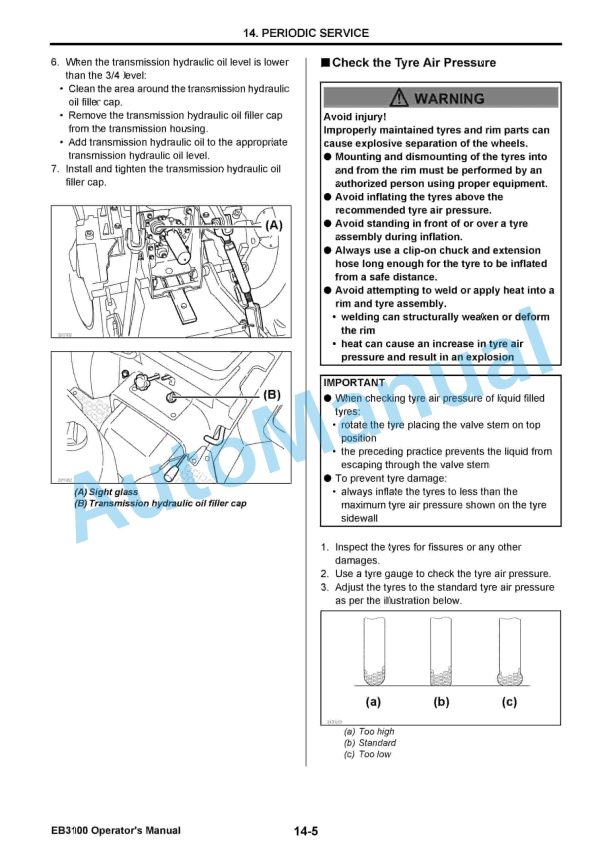
- 16.5.2. Inspect the Transmission Hydraulic Oil Level
- 16.5.3. Check the Tyre Air Pressure
- 16.5.4. Clean the Front Grille and Side Screens
- 16.5.5. Check the Fuel Line
- 16.5.6. Check the Power Steering Line
- 16.5.7. Check the Retractable Seatbelt
- 16.5.8. Check the Roll-Over Protective Structure (ROPS)
- 16.5.9. Check the Headlights, Hazard Lights, etc.
- 16.5.10. Check and Refill the Fuel Tank
- 16.5.11. Check and Clean the Rubber Dust Unloading Valve
- 16.5.12. Check the Radiator Hoses and Clamps
- 16.5.13. Clean Radiator Cooling Screen
- 16.5.14. Clean Radiator Cooling Fins
- 16.5.15. Check the Wheel Bolt Tightening Torque
- 16.5.16. Inspection Procedure for the Safety Interlock System
- 16.5.17. Check the Cooling System
- 16.6. Check and Replace as Necessary
- 16.6.1. Inspect the Alternator/Fan Belt
- 16.6.2. Check and Replace the Battery
- 16.6.3. Check the Fuses
- 16.6.4. Check the Light Bulbs
- 16.6.5. Check and Drain the Fuel/Water Separator
- 16.7. First 50 Hours
- 16.7.1. Change the Engine Oil
- 16.7.2. Replace the Engine Oil Filter
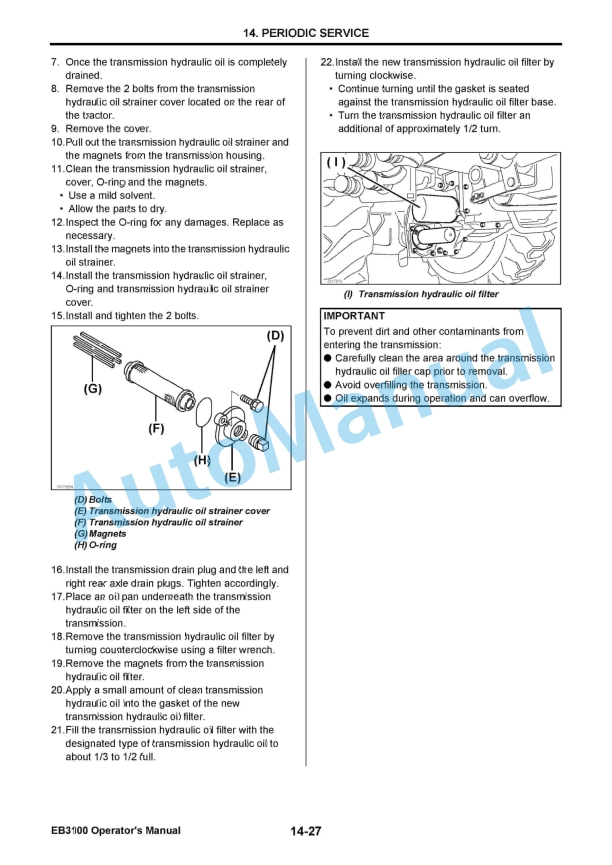
- 16.7.3. Replace the Transmission Hydraulic Oil Filters
- 16.7.4. Change the Transmission Hydraulic Oil
- 16.7.5. Clean the Transmission Hydraulic Oil Strainer
- 16.7.6. Change the Alternator/Fan Belt
- 16.8. Every 50 Hours
- 16.8.1. Check the Front Axle Oil Level
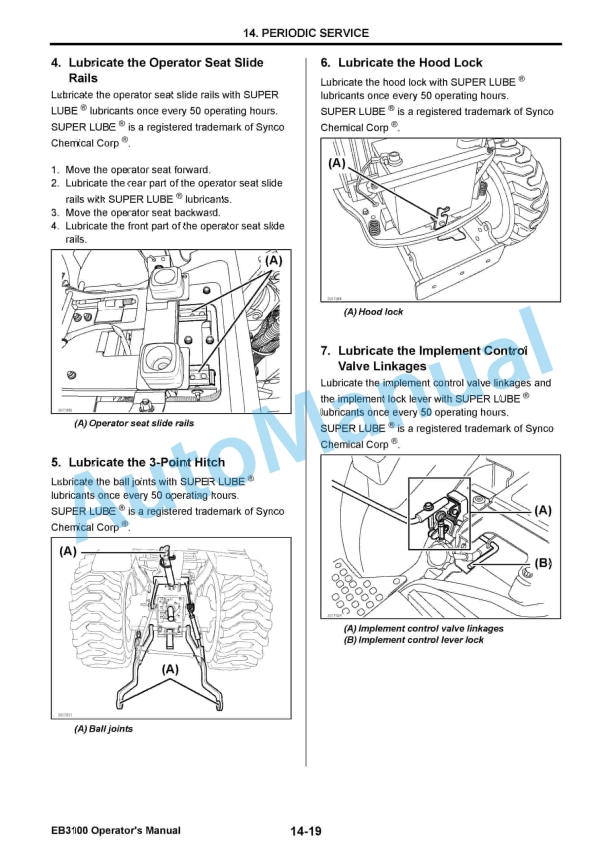
- 16.8.2. Grease Up
- 16.8.3. Service the Alternator/Fan Belt
- 16.8.4. Check the Fuel/Water Separator
- 16.8.5. Check the Battery Condition
- 16.9. Every 100 Hours
- 16.9.1. Service the Air Cleaner Element
- 16.9.2. Clean the Fuel/Water Separator and Replace the Fuel Filter
- 16.10. Every 200 Hours
- 16.10.1. Engine Oil
- 16.10.2. Change the Engine Oil and Engine Oil Filter
- 16.10.3. Inspect and Adjust the Toe-in
- 16.10.4. Check the Air Intake Hoses and Clamps
- 16.11. Every 300 Hours
- 16.11.1. Transmission Hydraulic Oil
- 16.11.2. Change the Transmission Hydraulic Oil and Replace the Transmission Hydraulic Oil Filters and Clean Transmission Hydraulic Oil Strainer
- 16.12. Every 500 Hours
- 16.12.1. Change the Front Axle Gear Oil
- 16.12.2. Replace the Fuel Filter
- 16.12.3. Adjust the Front Axle Pivot
- 16.12.4. Adjust the Brake
- 16.13. Every 1000 Hours
- 16.13.1. Service the Cooling System
- 16.13.2. Recommended Engine Coolant
- 16.13.3. Adjust the Tension of the Throttle Control Lever
- 16.13.4. Adjust the Engine Valve Clearance
- 16.13.5. Check the Fuel Injection Nozzle
- 16.13.6. Check the Fuel Injection Pump
- 16.14. Every 1 Year
- 16.14.1. Replace the Air Cleaner Element
- 16.15. Every 2 Years or 2000 Hours
- 16.15.1. Replace the Thermostat
- 16.16. General Maintenance
- 17. SERVICE THE ELECTRICAL SYSTEM
- 17.1. Battery
- 17.1.1. Service the Battery Safely
- 17.1.2. Inspect the Battery
- 17.1.3. Remove and Install the Battery
- 17.1.4. Clean the Battery and Terminals
- 17.1.5. Use a Booster Battery
- 17.1.6. Replace the Accessory Fuses
- 17.1.7. Check the Alternator Fuse and the Main Fuse
- 17.1.8. Replace the Headlight Bulb
- 17.1.9. Replace the Tail Lights Bulb and the Turn Signal/Hazard Lights Bulb
- 17.1.10. Replace the Sidelights Bulb
- 17.1.11. Replace the Instrument Panel Light Bulb
- 17.2. Headlights
- 17.2.1. Adjust the Headlights
- 18. STORAGE
- 18.1. Safe Practices for Storage
- 18.1.1. Prepare the Tractor for Storage
- 18.1.2. Prepare the Fuel and Engine for Storage
- 18.2. Prepare the Stored Tractor for Operation
- 19. TROUBLESHOOTING
- 19.1. How to Use the Troubleshooting Table
- 19.1.1. Engine
- 19.1.2. Electrical System
- 19.1.3. Brakes
- 19.1.4. Steering
- 19.1.5. Body and Machinery
- 20. INDEX


,%203GM30(F),%203HM35(F)%20Engine%20Operation%20Manual&url=https://pdfrepairmanual.com/docs/yanmar-1gm10-2gm20f-3gm30f-3hm35f-engine-operation-manual/&media=https://pdfrepairmanual.com/wp-content/uploads/2026/01/yanmar-1gm10-2gm20f-3gm30f-3hm35f-engine-operation-manual-1.jpg)


There are no reviews yet.