

Description
-
Model List:
- ViO33-6 Mini Excavator
- 1. Yanmar construction equipment europe s.a.s. thank you for purchasing a yanmar machine
- 2. DECLARATION OF CONFORMITY
- 3. Introduction
- 4. Safety signals
- 5. A Description and illustration of the machine
- 5.1. Applications and regulations
- 5.1.1. Applications
- 5.1.2. Warranty
- 5.1.3. Driving permits
- 5.1.4. Lifting
- 5.2. Identification plates
- 5.2.1. Machine serial number plate
- 5.2.2. Engine serial number plate
- 5.2.3. EPA information plate
- 5.2.4. Spare parts order and intervention request
- 5.3. Warning labels
- 5.3.1. Location of the warning adhesive labels
- 5.3.2. Explanation of the warning adhesive labels
- 5.4. Identification of important parts
- 5.4.1. General view of the machine
- 5.4.2. Commands and switches
- 5.5. Description of the driving position
- 5.5.1. Operator display station
- 5.5.1.1. Indicator lights
- 5.5.1.2. Clock
- 5.5.1.3. Time counter
- 5.5.1.4. Diesel gauge
- 5.5.1.5. Cooling fluid temperature indicator
- 5.5.1.6. Preheating light
- 5.5.1.7. Navigation keys
- 5.5.1.8. Information and error icons
- 5.5.2. Switches
- 5.5.2.1. Start key
- 5.5.2.2. Headlight switch
- 5.5.2.3. Horn
- 5.5.2.4. Windscreen wiper switch and windscreen wiper
- 5.5.2.5. Ventilation switch
- 5.5.2.6. Engine rate setting
- 5.5.2.7. Engine slow down switch
- 5.5.2.8. Eco mode switch
- 5.5.2.9. Engine stop switch
- 5.5.2.10. d gear switch
- 5.5.2.11. Interior lighting switch
- 5.5.3. Joysticks and pedals
- 5.5.3.1. Locking lever
- 5.5.3.2. Right command lever
- 5.5.3.3. d hydraulic circuit control (P.T.O. 1)
- 5.5.3.4. Left command lever
- 5.5.3.5. Travel levers and pedals
- 5.5.3.6. Blade lever
- 5.5.3.7. Protection of pedals
- 5.5.3.8. Boom rotation pedal
- 5.5.4. Power socket
- 5.5.5. Drivers seat
- 5.5.6. Seat support cover
- 5.5.7. Location for the tools and user manual
- 5.5.7.1. Toolkit
- 5.5.7.2. User manual
- 5.5.8. Fuses
- 5.5.8.1. Fusebox
- 5.5.9. Ash tray
- 5.5.10. Cabin
- 5.5.10.1. Cab side door
- 5.5.10.2. Upper windscreen
- 5.5.10.3. Lower windscreen
- 5.5.10.4. Right hand cab window
- 5.5.11. Headlights
- 5.6. Operation of the air conditioning
- 5.7. Covers
- 5.7.1. Bonnet
- 5.7.2. Cover B
- 5.7.3. Cover R
- 5.7.4. Rear cover
- 5.8. Heating valve
- 5.9. Options
- 5.9.1. Long arm
- 5.9.2. Half-circuit
- 5.9.3. PTO line 1
- 5.9.4. PTO line 2
- 5.9.5. Circuit breaker
- 5.9.6. Document holder
- 5.9.7. Additional counterweights
- 5.9.8. Lifting Kit
- 5.9.8.1. Lifting ring
- 5.9.8.2. Safety valves
- 5.9.8.3. Overload switch
- 5.9.8.4. Lifting Tables
- 5.9.9. Movement alarm
- 5.9.10. Plug-in beacon and rear LED light
- 5.9.11. Fleet management system
- 5.9.12. Radio
- 5.9.13. Air conditioning
- 5.9.14. Quick hitch
- 5.9.15. Continuous pressure hydraulic line
- 5.9.16. Mechanical quick hitch
- 5.9.16.1. Mechanical quick hitch ACB
- 5.9.16.2. Mechanical quick hitch L-SYSTEM
- 5.9.17. Quick hydraulic hitch L-SYSTEM
- 5.9.17.1. Dismantling the accessory
- 5.9.17.2. Mounting the accessory
- 6. B Operating instructions
- 6.1. Basic precautions
- 6.1.1. Comply with your workplaces safety rules
- 6.1.2. Put the safety mechanisms in place
- 6.1.3. Wear suitable clothing and protective equipment
- 6.1.4. Do not drive under the influence of alcohol, drugs or medication
- 6.1.5. Provide adequate ventilation when working in an enclosed space
- 6.1.6. Protect plants from hot air and exhaust fumes
- 6.1.7. Keep fuel and oil away from sparks
- 6.1.8. Avoid removing the caps when the temperatures are high
- 6.1.9. Avoid crush injuries due to accessories
- 6.1.10. Have an extinguisher and a first aid kit
- 6.1.11. Avoid any unauthorised modifications
- 6.1.12. Precautions for optional parts and tools
- 6.1.13. Warning concerning the cab windows
- 6.1.14. Cabins emergency exit
- 6.1.15. Air conditioning system
- 6.2. Usage precautions
- 6.2.1. Precautions before starting the engine
- 6.2.1.1. Make sure that your workplace is safe
- 6.2.1.2. Clean the machine
- 6.2.1.3. Check the safety structures
- 6.2.1.4. Check the position of the blade
- 6.2.1.5. Accessing the machine
- 6.2.1.6. Fasten your safety belt and adjust the rearview mirror(s)
- 6.2.2. Movement precautions
- 6.2.2.1. Machines Danger Zone
- 6.2.2.2. Movement and accessories
- 6.2.2.3. Driving the machine on a slope
- 6.2.3. Working precautions
- 6.2.3.1. Precautions for using the equipment
- 6.2.3.2. Dangerous tasks
- 6.2.3.3. Working near electricity lines
- 6.2.3.4. Working near obstacles
- 6.2.3.5. Emergency stop and securing the machine
- 6.2.3.6. Working on a slope
- 6.2.3.7. Working in an area covered with snow
- 6.2.3.8. Working on unstable ground
- 6.2.3.9. Working in a submerged area
- 6.2.3.10. Working in a muddy area
- 6.2.3.11. Working in an area with reduced visibility
- 6.2.4. Parking precautions
- 6.2.5. Precautions for the accessories
- 6.2.6. Precautions for using optional accessories
- 6.2.7. Precautions for the battery
- 6.3. Precautions for the engine
- 6.4. Checks before starting the machine
- 6.4.1. Overall visual inspection
- 6.4.2. Checking and topping up the level of cooling fluid
- 6.4.3. Checking and topping up the engine oil level
- 6.4.4. Checking and topping up the fuel level
- 6.4.5. Checking and topping up the hydraulic oil level
- 6.5. Checks after start-up
- 6.6. Checks after use
- 6.7. Operator LCD display station interfaces
- 6.7.1. Indication of functions
- 6.7.2. User Interface
- 6.7.3. Maintenance interface
- 6.7.4. Machine usage management interface
- 6.7.5. Configuration interface
- 6.8. Using the machine in cold weather
- 6.8.1. Preparation for use in cold weather
- 6.8.2. Starting in cold weather
- 6.8.3. Precautions after use
- 6.8.4. When cold weather is over
- 6.9. Rubber tracks
- 6.9.1. Correct use of rubber tracks
- 6.9.2. Comparison between rubber tracks / steel tracks
- 6.9.3. Rubber track warranty
- 6.9.4. Precautions for using rubber tracks
- 6.9.5. Track maintenance
- 6.9.6. Track replacement
- 6.10. Handling the bucket
- 6.10.1. Machine stability when using with a bucket or an accessory
- 6.10.2. Compatible accessories
- 6.10.3. Operation of the retro bucket
- 6.10.4. Digging trenches
- 6.10.5. Loading
- 6.11. Handling of accessories
- 6.11.1. Hydraulic hammer SOCOMEC
- 6.12. Accessory change by direct coupling
- 6.12.1. Dismantling the accessory
- 6.12.2. Mounting the accessory
- 6.12.2.1. Loading bucket
- 6.13. Load lifting
- 6.14. Implementing the 3rd hydraulic circuit
- 6.14.1. Description
- 6.14.1.1. d circuit selector
- 6.14.2. Mounting the accessory
- 6.14.3. Precautions for using the accessory
- 6.15. Transporting the machine
- 6.15.1. Loading/unloading the machine
- 6.15.1.1. Precautions for loading/unloading the machine
- 6.15.1.2. Procedure
- 6.15.2. Immobilising the machine on the truck
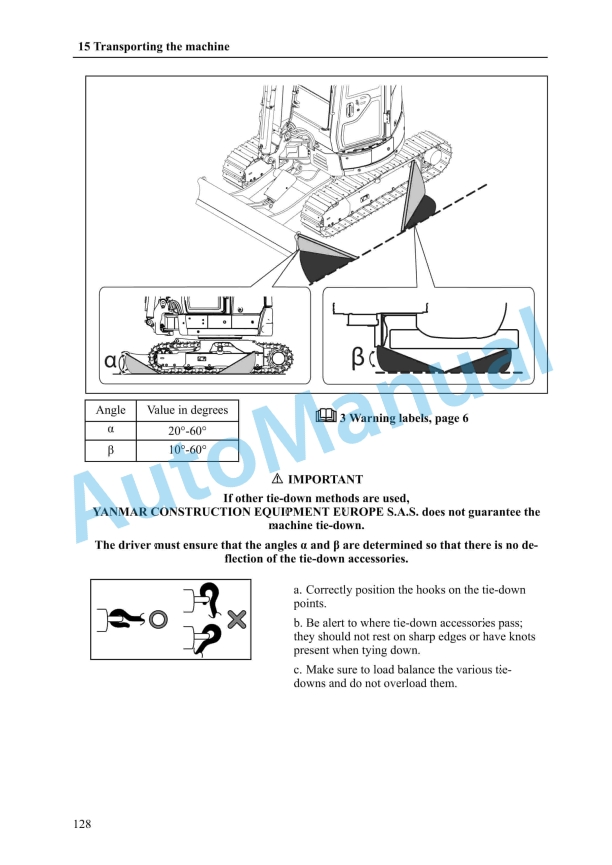
- 6.15.3. Tying down the machine
- 6.15.4. Slinging the machine
- 6.16. Detecting anomalies
- 6.16.1. Phenomena that do not constitute faults
- 6.16.2. Detecting anomalies
- 6.16.2.1. Engine
- 6.16.2.2. Electrical equipment
- 6.16.2.3. Machine structure
- 6.17. If the battery is discharged
- 6.17.1. Precautions for connecting and disconnecting the starter cables
- 6.17.2. Connecting the starter cables
- 6.17.3. Starting the engine
- 6.17.4. Disconnecting the starter cables
- 6.17.5. Charging the battery
- 6.18. Towing the machine
- 7. C Periodic maintenance programme
- 7.1. Periodic inspections and upkeeps
- 7.2. Maintenance precautions
- 7.2.1. Precautions before maintenance
- 7.2.1.1. Removing the residual pressure
- 7.2.1.2. Place a warning label
- 7.2.1.3. Establish a safety perimeter
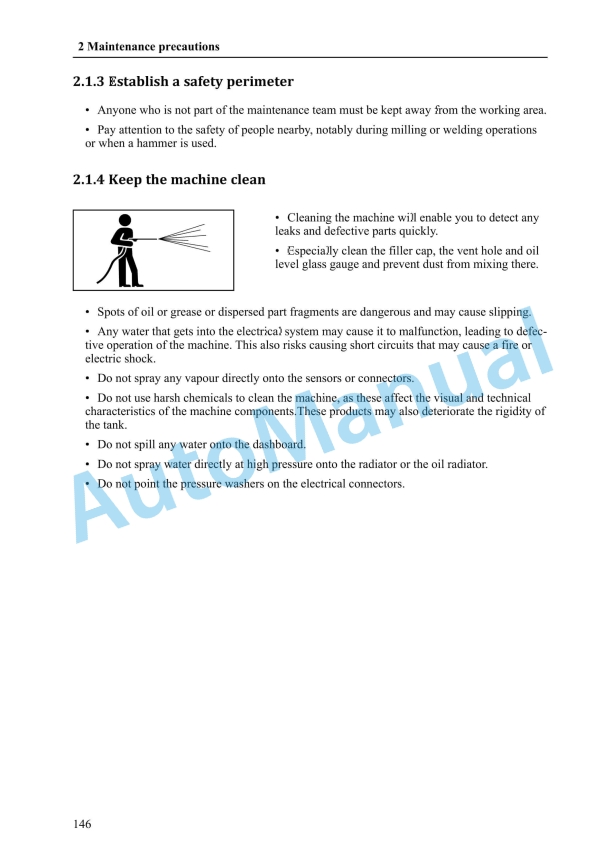
- 7.2.1.4. Keep the machine clean
- 7.2.2. Precautions during maintenance
- 7.2.2.1. Oil and grease
- 7.2.2.2. Tools
- 7.2.2.3. Parts
- 7.2.2.4. Dismantling the accessory
- 7.2.2.5. Working under the machine
- 7.2.2.6. Lighting
- 7.2.2.7. Battery
- 7.2.2.8. Hoses
- 7.2.2.9. Radiator ventilator
- 7.2.2.10. Soldering
- 7.2.2.11. Waste processing
- 7.3. Recommended greases and fluids
- 7.4. First maintenance
- 7.4.1. After the first 50 hours of service
- 7.4.2. After the first 250 hours of service
- 7.5. List of periodic inspections and maintenance operations
- 7.6. Maintenance by the operator
- 7.6.1. Daily maintenance
- 7.6.1.1. Checking the machine before use
- 7.6.1.2. Checks after using the machine
- 7.6.1.3. Checking the commands
- 7.6.1.4. Checking the seat
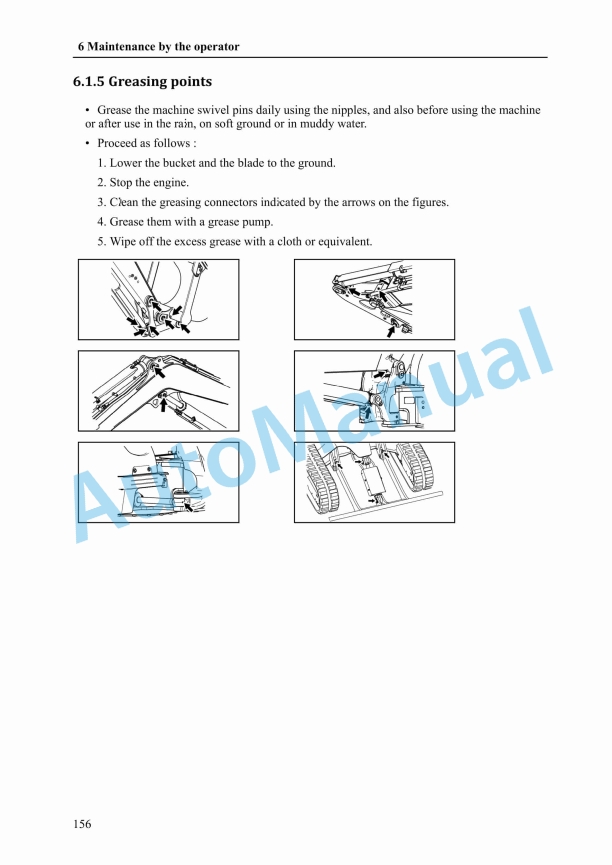
- 7.6.1.5. Greasing points
- 7.6.1.6. Cleaning the separator/decanter
- 7.6.1.7. Purging the fuel tank
- 7.6.1.8. Checking the hydraulic hoses
- 7.6.1.9. Visual inspection of the fuel hoses
- 7.6.2. Maintenance every 50 hours
- 7.6.2.1. Greasing the pin and rotation crown
- 7.6.3. Maintenance every 15 days
- 7.6.3.1. Checking the air conditioning/heating system
- 7.6.4. Non periodic maintenance
- 7.6.4.1. Fuse replacement
- 7.6.4.2. Top up the windscreen washer fluid
- 7.6.4.3. Replacing the windscreen wiper
- 7.6.4.4. Accessory state check
- 7.6.5. Rubber track maintenance
- 7.6.5.1. Checking the condition of the tracks
- 7.6.5.2. Track replacement
- 7.6.5.3. Tension check
- 7.6.5.4. Increasing the tension
- 7.6.5.5. Releasing the tension
- 7.6.6. Steel track maintenance
- 7.6.6.1. Checking the condition of the tracks
- 7.6.6.2. Track replacement
- 7.6.6.3. Tension check
- 7.6.6.4. Increasing the tension
- 7.6.6.5. Releasing the tension
- 7.7. Maintenance by the dealer
- 8. D Conservation and storage
- 8.1. Conservation
- 8.2. Storage
- 8.3. Recommissioning
- 9. E Technical data
- 9.1. Specifications
- 9.2. Working dimensions
- 9.3. Noise emitted by the machine
- 9.4. Vibrations emitted by the machine
- 10. F Lifting capacities
- 10.1. Lifting ViO33-6 Canopy
- 10.2. Lifting ViO33-6 Cabin
- 11. Appendices
- 11.1. A List of error codes displayed on the operator display station
- 11.2. B Control sheets to be photocopied
- 11.3. C Notes
- 11.4. D Lashing record


,%203GM30(F),%203HM35(F)%20Engine%20Operation%20Manual&url=https://pdfrepairmanual.com/docs/yanmar-1gm10-2gm20f-3gm30f-3hm35f-engine-operation-manual/&media=https://pdfrepairmanual.com/wp-content/uploads/2026/01/yanmar-1gm10-2gm20f-3gm30f-3hm35f-engine-operation-manual-1.jpg)


There are no reviews yet.