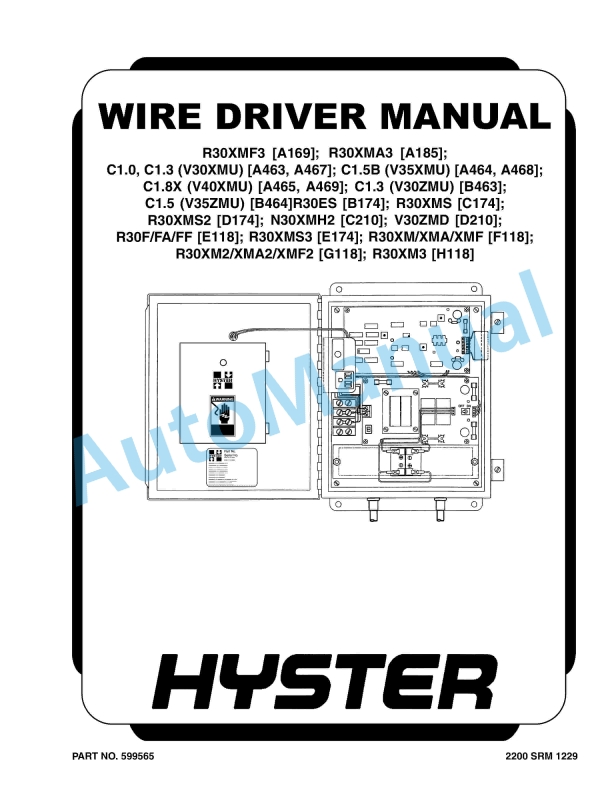
Hyster R30XMF3 to R30XM3 Wire Driver Manual Maintenance And Repair
$30.00
- Type Of Manual: Maintenance And Repair
- Number of Pages: 1346
- Size: 51.8MB
- Format: PDF
Description
-
Model List:
- R30XMF3, R30XMA3, C1.0, C1.3, C1.5B, C1.8X, C1.5, R30ES, R30XMS, R30XMS2, N30XMH2, V30ZMD, R30F, R30FA, R30FF, R30XMS3, R30XM, R30XMA, R30XMF, R30XM2, R30XMA2, R30XMF2, R30XM3
- 1. RM1229-(01-2012)-US-EN
- 1.1. Wire Driver Manual
- 1.2. Safety Precautions Maintenance and Repair
- 1.3. General
- 1.4. Description
- 1.5. Installation Procedure
- 1.6. Checks and Adjustments
- 1.7. Adjustments (Early Model)
- 1.8. Adjustments (Late Model)
- 1.9. Troubleshooting
- 1.10. Wire Driver Troubleshooting
- 1.11. Guide Wire Troubleshooting
- 1.12. Guide Wire Repair
- 1.13. Short Circuit Repair
- 1.14. Open Circuit Repair
- 1.15. System II Wire Guidance Specifications
- 1.16. Table 1. Wire Driver Troubleshooting
- 2. RM1230-(01-2012)-US-EN
- 2.1. Guide Wire Installation
- 2.2. Safety Precautions Maintenance and Repair
- 2.3. General
- 2.4. Description
- 2.5. Guide Wire Physical Installation
- 2.6. Equipment
- 2.7. Specifications
- 2.8. Wire Slot and Expansion Loop Specifications
- 2.9. Material and General Specifications
- 2.10. System II Wire Guidance Specifications
- 2.11. Pre-Installation Information Form
- 2.12. Table 1. Equipment
- 2.13. Table 2. Material Specifications
- 2.14. Table 3. General Specifications
- 3. RM0285-(06-2010)-US-EN
- 3.1. Drive Axle, Speed Reducer, and Differential
- 3.2. Safety Precautions Maintenance and Repair
- 3.3. General
- 3.4. Description
- 3.5. Drive Axle, Speed Reducer, and Differential Repair
- 3.6. Drive Axle, Remove
- 3.7. Drive Axle, Disassemble
- 3.8. Speed Reducer and Differential, Disassemble
- 3.9. Inspect
- 3.10. Assemble
- 3.11. Speed Reducer and Differential, Assemble
- 3.12. Drive Axle, Assemble
- 3.13. Drive Axle Assembly, Install
- 3.14. Torque Specifications
- 3.15. Wheel Nuts
- 3.16. Axle Shaft Capscrews
- 3.17. Axle Hangers to Frame
- 3.18. Back Plate to Axle Mount Capscrews
- 3.19. Wheel Cylinder Capscrews
- 3.20. Ring Gear to Differential Case
- 3.21. Differential Case Halves
- 3.22. Bearing Cap Capscrews
- 3.23. Retainer Capscrews
- 3.24. Axle Housing to Differential Housing
- 3.25. Pinion Nut
- 3.26. Speed Reducer Housing to Differential Housing
- 3.27. Traction Motor to Transmission
- 3.28. Troubleshooting
- 3.29. Table 1. Adjustment of Shims for Pinion Assembly
- 3.30. Table 2. Ring and Pinion Tooth Contact Adjustment
- 4. RM0480-(04-2008)-US-EN
- 4.1. Safety Precautions Maintenance and Repair
- 4.2. General
- 4.3. Mast Weldments
- 4.4. Carriages
- 4.5. Two-Stage Mast
- 4.6. Description
- 4.7. Operation
- 4.8. Three-Stage Mast
- 4.9. Description
- 4.10. Operation
- 5. RM0481-(07-2013)-US-EN
- 5.1. Lift Cylinders
- 5.2. Safety Precautions Maintenance and Repair
- 5.3. General
- 5.4. Description
- 5.5. Lowering Control Valve
- 5.6. Main Cylinder Repair
- 5.7. Disassemble
- 5.8. Assemble
- 5.9. Free-Lift Cylinder Repair
- 5.10. Disassemble
- 5.11. Assemble
- 5.12. Troubleshooting
- 6. RM0482-(04-2008)-US-EN
- 6.1. Safety Precautions Maintenance and Repair
- 6.2. General
- 6.3. Safety Procedures When Working Near Mast
- 6.4. Load Backrest Extension, Carriage, Load Rollers, Side Rollers, a
- 6.5. Load Backrest Extension, Remove and Install
- 6.6. Carriage Assembly, Remove and Install
- 6.7. Carriage Load Rollers, Remove and Install
- 6.8. Side Rollers, Disassemble and Assemble
- 6.9. Fork, Replace
- 6.10. Hook-Type Forks
- 6.11. Two-Stage Mast Assembly
- 6.12. Clean and Inspect
- 6.13. Lift Cylinders, Remove and Install Dual-Lift Cylinders
- 6.14. Lift Cylinder, Remove and Install Single Main-Lift Cylinders
- 6.15. Install
- 6.16. Inner Mast Assembly, Remove and Install
- 6.17. Hoses, Replace
- 6.18. Hose and Cable Sheaves, Replace
- 6.19. Two-Stage Lift Chains
- 6.20. Remove and Install
- 6.21. Clean and Inspect
- 6.22. Two-Stage Chain Sheave, Remove and Install
- 6.23. Load Rollers and Wear Plugs, Remove and Install
- 6.24. Two-Stage Mast Assembly, Install
- 6.25. Three-Stage Mast Assembly
- 6.26. Three-Stage Mast Assembly, Remove
- 6.27. N30XHM, N30XMH 2 (C210), and V30ZMD (D210/E210) Only
- 6.28. Clean and Inspect
- 6.29. Free-Lift Cylinder, Remove and Install
- 6.30. Main Cylinders (Standard), Remove and Install
- 6.31. Main Cylinders N30XMH, N30XMH 2 (C210) and V30ZMD (D210/E210), R
- 6.32. Inner and Intermediate Mast Assemblies, Remove and Install
- 6.33. Hoses, Replace
- 6.34. Hose and Cable Sheaves, Replace
- 6.35. Free-Lift Hose Sheave
- 6.36. Carriage Sheaves
- 6.37. Three-Stage Lift Chains, Remove and Install
- 6.38. General
- 6.39. Free-Lift Chains
- 6.40. Main-Lift Chains
- 6.41. Three-Stage Chain Sheaves, Disassemble and Assemble
- 6.42. Free-Lift Chain Sheaves
- 6.43. Main-Lift Chain Sheaves
- 6.44. Load Rollers and Wear Plugs, Remove and Install
- 6.45. Three-Stage Mast Assemble, Install
- 6.46. Mast Operation Check
- 6.47. Hydraulic System Leaks Check
- 6.48. Lift Chains Check
- 6.49. General
- 6.50. Clean and Inspect
- 6.51. Lubrication
- 6.52. Mast Adjustments
- 6.53. General
- 6.54. Adjust Wear Plugs – Mast
- 6.55. Adjust Free-Lift Chain (Three-Stage Only)
- 6.56. Adjust Main-Lift Chains
- 6.57. Two-Stage
- 6.58. Three-Stage
- 6.59. Adjust Wear Strips
- 6.60. Carriage Adjustments
- 6.61. Adjust Wear Plug – Carriage
- 6.62. Adjust Side Rollers – Carriage
- 6.63. Adjust Thrust Rollers – Carriage
- 6.64. Troubleshooting
- 7. RM0485-(08-2003)-US-EN
- 7.1. Steering System for Electric Lift Trucks
- 7.2. Safety Precautions Maintenance and Repair
- 7.3. General
- 7.4. Description
- 7.5. Steering Wheel and Column Assembly Repair
- 7.6. Assembly Components, Remove
- 7.7. Assembly Components, Install
- 7.8. Power Steering Motor and Pump
- 7.9. Description
- 7.10. Remove and Disassemble, Models E1.25-3.00XL (E25-60XL), J2.00-3.
- 7.11. Remove and Disassemble, Models E3.50-5.50XL (E70-120XL, E70-120X
- 7.12. Remove and Disassemble, Models J2.00-3.20XM (J40-60XM, J40-60XM
- 7.13. Remove and Disassemble, Models A1.00-1.50XL (A20-30XL)
- 7.14. Remove and Disassemble, Models E1.50-2.00XMS (E25-40XMS, E25-40X
- 7.15. Assemble and Install – All models with a vertical mount except J
- 7.16. Assemble and Install, Models J2.00-3.20XM (J40-60XM, J40-60XM 2
- 7.17. Assemble and Install, Models E1.50-2.00XMS (E25-40XMS, E25-40XM
- 7.18. Power Steering Pump, Repair
- 7.19. Seal, Replace
- 7.20. Hydraulic Steering Motor
- 7.21. Description
- 7.22. Hydraulic Steering Motor Repairs
- 7.23. Disassemble
- 7.24. Clean and Inspect
- 7.25. Assemble
- 7.26. Install
- 7.27. Steering System Air Removal
- 7.28. Steering Pressure Check
- 7.29. Steering Chain Tension Check (Unit With MDU Only)
- 7.30. Optical Encoder and Activator Circuits Check
- 7.31. Troubleshooting
- 8. RM0512-(08-2003)-US-EN
- 8.1. Steering Housing and Control Unit
- 8.2. Safety Precautions Maintenance and Repair
- 8.3. General
- 8.4. Description
- 8.5. Operation
- 8.6. Steering Wheel and Column Assembly Repair
- 8.7. Steering Column Assembly, Remove
- 8.8. Steering Control Unit
- 8.9. Steering Column Assembly, Install
- 8.10. System Air Removal
- 8.11. Troubleshooting
- 9. RM0514-(01-2004)-US-EN
- 9.1. Instrument Cluster
- 9.2. Safety Precautions Maintenance and Repair
- 9.3. General
- 9.4. Description
- 9.5. Display Panels on Steering Column, Internal Combustion
- 9.6. Display Panels on Steering Column, Electric Lift Trucks
- 9.7. Standard Display Panel
- 9.8. Enhanced Display Panel
- 9.9. Curtis 1215 Display Panel
- 9.10. Description and Features
- 9.11. Operation
- 9.12. Cluster-Type Display Panel (Internal Combustion) Replacement
- 9.13. Remove and Disassemble
- 9.14. Assemble and Install
- 9.15. Cluster Display Panel (Electric Lift Truck) Replacement
- 9.16. Display Panel Assembly, Replace
- 9.17. LED Indicators
- 9.18. Battery Indicators
- 9.19. Digital Display (Enhanced Display Panel Only)
- 9.20. Status Code or Performance Level Switches and LED indicators (En
- 9.21. Standard Display Panel Parts, Replace
- 9.22. Enhanced Display Panel Parts, Replace
- 9.23. Curtis 1215 Display Panel Replacement
- 9.24. Install
- 9.25. Table 1. Instrument Cluster, Internal Combustion
- 10. RM0551-(08-2003)-US-EN
- 10.1. Electrical Diagrams
- 10.2. Safety Precautions Maintenance and Repair
- 11. RM0555-(10-1999)-US-EN
- 12. RM0557-(08-2003)-US-EN
- 12.1. EV-100ZX SCR Motor Controller
- 12.2. Safety Precautions Maintenance and Repair
- 12.3. General
- 12.4. Model Number Data For EV-100ZX Controller
- 12.5. Register Parameters
- 12.6. General
- 12.7. Function Numbers
- 12.8. Control Card, Checks and Adjustments
- 12.9. Handset
- 12.10. How to Check and Adjust Registers
- 12.11. How to Scroll through Fault Codes and Clear Them
- 12.12. Checks and Adjustments on Workbench
- 12.13. When Handset Is Connected to Control Card Installed In Lift Truc
- 12.14. Function Numbers 1 through 15
- 12.15. Function Numbers 16 through 30
- 12.16. Function Numbers 48 through 62
- 12.17. Control Cards
- 12.18. Function Number Descriptions
- 12.19. Traction Control Cards (Label Letters – ZH and ZY)
- 12.20. Function Number 1 STORED STATUS CODE
- 12.21. Function Number 2 CREEP SPEED
- 12.22. Function Number 3 CONTROLLED ACCELERATION AND 1A TIME
- 12.23. Function Number 4 CURRENT LIMIT
- 12.24. Function Number 5 PLUGGING DISTANCE (CURRENT)
- 12.25. Function Number 6 1A DROP OUT CURRENT
- 12.26. Function Number 7 FIELD WEAKENING PICK UP
- 12.27. Function Number 8 FIELD WEAKENING DROP OUT
- 12.28. Function Number 9 REGENERATIVE BRAKING CURRENT LIMIT
- 12.29. Function Number 10 REGENERATIVE BRAKING START
- 12.30. Function Number 13 SPEED LIMIT 3 (SL3)
- 12.31. Function Number 14 INTERNAL RESISTANCE COMPENSATION
- 12.32. Function Number 15 BATTERY VOLTS
- 12.33. Function Numbers GREATER THAN 15
- 12.34. Function Number 16 PEDAL POSITION PLUG
- 12.35. Function Number 17 CARD TYPE SELECTION
- 12.36. Function Number 18 STEERING PUMP TIME DELAY
- 12.37. Function Number 19 MAINTENANCE ALERT (Tens/Units)
- 12.38. Function Number 20 MAINTENANCE ALERT (Thousands/Hundreds)
- 12.39. Function Number 21 MAINTENANCE SPEED LIMIT
- 12.40. Function Numbers 22 Through 28 TEMPORARY DATA REGISTERS
- 12.41. Function Number 29 HOURMETER (Tens/Units)
- 12.42. Function Number 30 HOURMETER (Thousands/Hundreds)
- 12.43. Function Number 48 Through 62 SET LIFT TRUCK PERFORMANCE
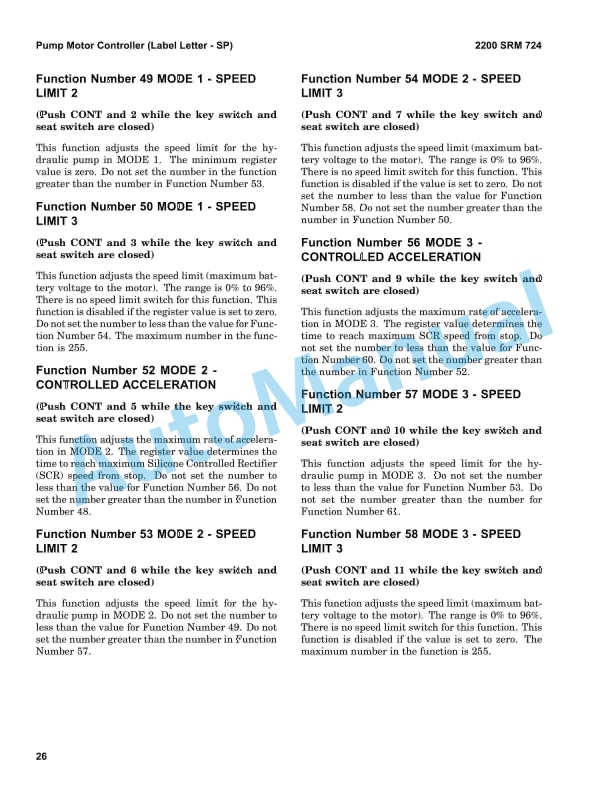
- 12.44. Function Number 48 CONTROLLED ACCELERATION AND 1A TIME
- 12.45. Function Number 49 FIELD WEAKENING PICK UP
- 12.46. Function Number 50 SPEED LIMIT 1
- 12.47. Function Number 52 CONTROLLED ACCELERATION AND 1A TIME
- 12.48. Function Number 53 FIELD WEAKENING PICK UP
- 12.49. Function Number 54 SPEED LIMIT 1
- 12.50. Function Number 56 CONTROLLED ACCELERATION AND 1A TIME
- 12.51. Function Number 57 FIELD WEAKENING PICK UP
- 12.52. Function Number 58 SPEED LIMIT 1
- 12.53. Function Number 60 CONTROLLED ACCELERATION AND 1A TIME
- 12.54. Function Number 61 FIELD WEAKENING PICK UP
- 12.55. Pump Control Card (Label Letter ZP)
- 12.56. Function Number 1 STORED STATUS CODE
- 12.57. Function Number 2 INTERNAL RESISTANCE COMPENSATION START
- 12.58. Function Number 3 CONTROLLED ACCELERATION
- 12.59. Function Number 4 CURRENT LIMIT
- 12.60. Function Number 7 CONTROLLED ACCELERATION COMPENSATION
- 12.61. Function Number 11 SPEED LIMIT 1 (SL1) (Slow Speed) – Tilt and S
- 12.62. Function Number 12 SPEED LIMIT 2 (SL2) (Medium Speed) – Slow Lif
- 12.63. Function Number 13 SPEED LIMIT 3 (SL3)
- 12.64. Function Number 14 SPEED LIMIT 4 (SL4) Fast Lift
- 12.65. Function Numbers Greater Than 15
- 12.66. Function Number 16 INTERNAL RESISTANCE COMPENSATION
- 12.67. Function Number 17 CARD TYPE SELECTION
- 12.68. Function Numbers 18 through 28 TEMPORARY DATA REGISTERS
- 12.69. Function Number 29 HOURMETER (Tens/Units)
- 12.70. Function Number 30 HOURMETER (Thousands/Hundreds)
- 12.71. Function Number 48 CONTROLLED ACCELERATION
- 12.72. Function Number 49 SPEED LIMIT 2
- 12.73. Function Number 50 SPEED LIMIT 3
- 12.74. Function Number 52 CONTROLLED ACCELERATION
- 12.75. Function Number 53 SPEED LIMIT 2
- 12.76. Function Number 54 SPEED LIMIT 3
- 12.77. Function Number 56 CONTROLLED ACCELERATION
- 12.78. Function Number 57 SPEED LIMIT 2
- 12.79. Function Number 58 SPEED LIMIT 3
- 12.80. Function Number 60 CONTROLLED ACCELERATION
- 12.81. Function Number 61 SPEED LIMIT 2
- 12.82. Function Number 62 SPEED LIMIT 3
- 12.83. Register Parameters
- 12.84. Troubleshooting
- 12.85. General
- 12.86. Status Codes
- 12.87. Register Maps
- 12.88. Status Code Charts
- 12.89. EV-100ZX SCR Motor Controller Repair
- 12.90. SCR, Check
- 12.91. SCR Assembly
- 12.92. Thermal Protector
- 12.93. SCR 1 Assembly, Replace
- 12.94. OFF Circuit for SCR 1
- 12.95. Reactor Assembly, Check
- 12.96. Suppressors for SCR 2 and SCR 5, Check
- 12.97. SCR 2 and SCR 5, Check
- 12.98. SCR 2 and SCR 5, Replace
- 12.99. Capacitor C1, Check
- 12.100. Diodes D3 and D4
- 12.101. Diodes D3 and D4, Check
- 12.102. Diodes D3 and D4, Replace
- 12.103. Motor Current Sensor
- 12.104. Contactors



%20Service%20Manual&url=https://pdfrepairmanual.com/docs/hyster-a406-r1-4-r1-6-service-manual/&media=https://pdfrepairmanual.com/wp-content/uploads/2026/01/hyster-a406-r14-r16-service-manual-1.jpg)
%20Service%20Manual&url=https://pdfrepairmanual.com/docs/hyster-b418-p1-6-p1-8-p2-0-p2-2-service-manual/&media=https://pdfrepairmanual.com/wp-content/uploads/2026/01/hyster-b418-p16-p18-p20-p22-service-manual-1.jpg)
%20Service%20Manual&url=https://pdfrepairmanual.com/docs/hyster-b460-k1-0m-k1-0h-k1-0h-wp-service-manual/&media=https://pdfrepairmanual.com/wp-content/uploads/2026/01/hyster-b460-k10m-k10h-k10h-wp-service-manual-1.jpg)

%20Service%20Manual&url=https://pdfrepairmanual.com/docs/hyster-c098-e70-120xl-service-manual/&media=https://pdfrepairmanual.com/wp-content/uploads/2026/01/hyster-c098-e70-120xl-service-manual-1.jpg)
%20Service%20Manual&url=https://pdfrepairmanual.com/docs/hyster-c098-e3-50-5-50xl-service-manual/&media=https://pdfrepairmanual.com/wp-content/uploads/2026/01/hyster-c098-e350-550xl-service-manual-1.jpg)

%20Service%20Manual&url=https://pdfrepairmanual.com/docs/hyster-c001-h25-35xl-service-manual/&media=https://pdfrepairmanual.com/wp-content/uploads/2026/01/hyster-c001-h25-35xl-service-manual-1.jpg)
%20Service%20Manual&url=https://pdfrepairmanual.com/docs/hyster-c007-h150-275hp150-200b-service-manual/&media=https://pdfrepairmanual.com/wp-content/uploads/2026/01/hyster-c007-h150-275hp150-200b-service-manual-1.jpg)
There are no reviews yet.