Hyster RS45-30CH, RS45-27IH, RS46-33CH, RS46-30IH, RS46-36CH, RS46-33IH Diagrams Maintenance And Repair
$30.00
- Type Of Manual: Maintenance And Repair
- Number of Pages: 1354
- Size: 42.3MB
- Format: PDF
Description
-
Model List:
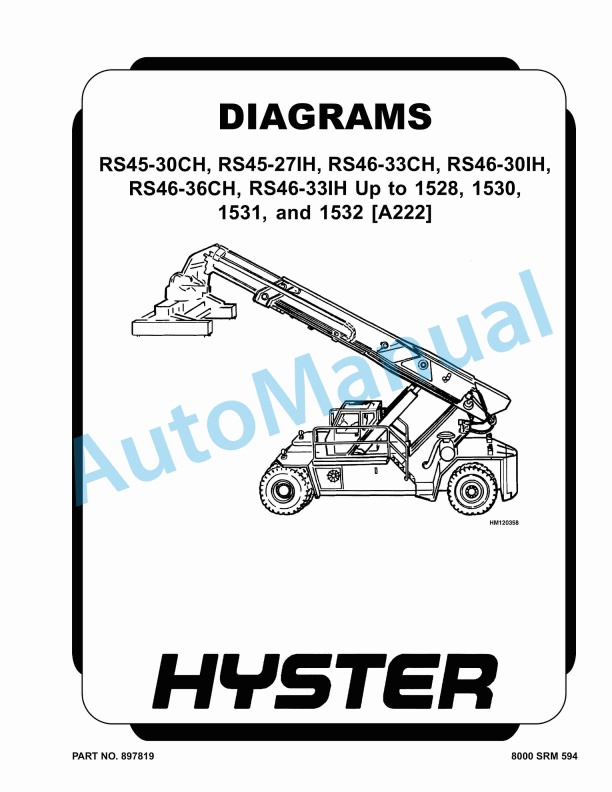
- RS45-30CH, RS45-27IH, RS46-33CH, RS46-30IH, RS46-36CH, RS46-33IH Diagrams
- 1. RM0594-(03-2005)-UK-EN
- 1.1. Diagrams
- 1.2. Safety Precautions Maintenance and Repair
- 2. RM0616-(03-2005)-UK-EN
- 2.1. Capacities and Specifications
- 2.2. Safety Precautions Maintenance and Repair
- 2.3. Vehicle Weights
- 2.4. Capacities
- 2.5. Electrical System
- 2.6. Engine Specifications
- 2.7. Tire Sizes
- 2.8. Torque Specifications
- 2.9. Counterweight
- 2.10. Drive Axle
- 2.11. Drive Shaft
- 2.12. Steering Axle
- 2.13. Wheel Nuts
- 2.14. Lifting Capacties
- 2.15. Container Spreader
- 2.16. Intermodel Spreader
- 3. RM0631-(03-2005)-UK-EN
- 3.1. Safety Precautions Maintenance and Repair
- 3.2. General
- 3.3. Description
- 3.4. Counterweight
- 3.5. Install
- 3.6. Fenders
- 3.7. Front Fender
- 3.8. Install
- 3.9. Rear Fender
- 3.10. Install
- 3.11. Hydraulic Tank Platform
- 3.12. Small Leaks
- 3.13. Large Leaks
- 3.14. Steam Method
- 3.15. Chemical Solution Method
- 3.16. Other Methods of Preparation for Repair
- 3.17. Install
- 3.18. Fuel Tank Platform
- 3.19. Install
- 3.20. Transmission Oil Cooler
- 3.21. Install
- 3.22. Radiator Repair
- 3.23. Install
- 3.24. Exhaust System
- 3.25. Install
- 3.26. Engine Removal and Installation
- 3.27. Install
- 3.28. Operator Compartment
- 3.29. General
- 3.30. Tilting
- 3.31. Lowering
- 3.32. Install
- 3.33. Gauges and Switches
- 3.34. Window Wipers
- 3.35. Single Arm Unit (Rear Window)
- 3.36. Install
- 3.37. Single Arm Unit (Top Window)
- 3.38. Install
- 3.39. Double Arm Unit
- 3.40. Install
- 3.41. Window Washer Motor/Pumps
- 3.42. Install
- 3.43. Heater Assembly
- 3.44. Install
- 3.45. Door Handle Assembly
- 3.46. Install
- 3.47. Window Replacement
- 3.48. Windshield
- 3.49. Install
- 3.50. Rear Window
- 3.51. Install
- 3.52. Top Window
- 3.53. Install
- 3.54. Operator Restraint System
- 3.55. Label Replacement
- 4. RM0634-(03-2005)-UK-EN
- 4.1. Four-Speed Powershift Transmission
- 4.2. Safety Precautions Maintenance and Repair
- 4.3. General
- 4.4. Automatic Powershift Control
- 4.5. Transmission Control System
- 4.6. Transmission Control Lever
- 4.7. Mechanical Description and Operation
- 4.8. General
- 4.9. Torque Converter
- 4.10. Description
- 4.11. Operation
- 4.12. Clutch Assemblies
- 4.13. Description
- 4.14. Operation
- 4.15. Transmission Operation in Neutral
- 4.16. Input Shaft, Forward Shaft, and Clutch Assembly
- 4.17. Description
- 4.18. Operation
- 4.19. Reverse, Second-Speed, and First-Speed Shaft and Clutch Assembli
- 4.20. Description
- 4.21. Operation
- 4.22. Third-Speed Shaft, Gear, and Clutch Assembly
- 4.23. Description
- 4.24. Operation
- 4.25. Fourth-Speed Shaft and Clutch
- 4.26. Description
- 4.27. Operation
- 4.28. Output Shaft
- 4.29. Description
- 4.30. Operation
- 4.31. Hydraulic Description and Operation
- 4.32. Sump, Filter, and Pump
- 4.33. Transmission Charge Pump
- 4.34. Pressure Regulator Valve
- 4.35. Relief Valve
- 4.36. Transmission Control Valve
- 4.37. Solenoid Valves
- 4.38. Direction Spools
- 4.39. Range Spools
- 4.40. Modulator Valves
- 4.41. Table 1. Solenoid Controls
- 5. RM0635-(06-2007)-UK-EN
- 5.1. Four-Speed Powershift Transmission
- 5.2. Safety Precautions Maintenance and Repair
- 5.3. General
- 5.4. Torque Converter Repair
- 5.5. Torque Converter, Remove
- 5.6. Torque Converter, Disassemble
- 5.7. Clean and Inspect
- 5.8. Torque Converter, Assemble
- 5.9. Torque Converter (Turbine) Housing, Disassemble
- 5.10. Relief Valve for Lube Pressure, Disassemble and Assemble
- 5.11. Oil Sealing Rings Sleeve, Replace
- 5.12. Torque Converter Housing, Assemble
- 5.13. Torque Converter, Install
- 5.14. Transmission Repair
- 5.15. Remove, Transmission Only
- 5.16. Transmission and Engine Assembly, Remove
- 5.17. Transmission, Disassemble
- 5.18. Output Shaft, Disassemble and Assemble
- 5.19. Fourth-Speed Shaft, Disassemble and Assemble
- 5.20. Third-Speed Shaft, Disassemble and Assemble
- 5.21. Forward Shaft and Clutch, Disassemble and Assemble
- 5.22. Reverse and Second-Speed Shaft and Clutch, Disassemble and Assem
- 5.23. First-Speed Shaft and Clutch, Disassemble and Assemble
- 5.24. Input Shaft, Disassemble and Assemble
- 5.25. Speed Sensor, Install
- 5.26. Transmission, Clean and Inspect
- 5.27. Transmission, Assemble
- 5.28. Control Valve
- 5.29. Clean and Inspect
- 5.30. Assemble and Install
- 5.31. Install, Transmission
- 5.32. Install, Transmission and Engine Assembly
- 5.33. Clean Oil System of Transmission After Major Repair
- 5.34. Automatic Powershift Control (APC 100)
- 5.35. Functional Description
- 5.36. Transmission Control Lever
- 5.37. First-Speed Shaft Bearings Adjustment
- 5.38. Torque Converter Stall Speed Check
- 5.39. Transmission Oil Pressures Check
- 5.40. Clutch Pressures Check
- 5.41. Torque Converter (Torque Converter Regulator) Oil Pressure Check
- 5.42. Troubleshooting
- 5.43. Transmission Controller (APC 100)
- 5.44. Table 1. Flange Nut Torque
- 5.45. Table 2. APC 100 Control Module (Pin Connections)
- 5.46. Table 3. Hobbs Gear Selector Connections
- 5.47. Table 4. Example Torque Values at Dimensions Shown
- 5.48. Table 5. Transmission Pressures
- 6. RM0637-(03-2005)-UK-EN
- 6.1. Steering System
- 6.2. Safety Precautions Maintenance and Repair
- 6.3. General
- 6.4. General
- 6.5. Description
- 6.6. Steering Wheel and Column Assembly
- 6.7. General
- 6.8. Transmission Control Lever
- 6.9. Turn Signal Control Lever
- 6.10. Steering Wheel
- 6.11. Install
- 6.12. Steering Column Assembly
- 6.13. Install
- 6.14. Steering Control Unit
- 6.15. Description
- 6.16. Operation
- 6.17. Load Sensing Steering
- 6.18. Disassemble
- 6.19. Assemble and Install
- 6.20. Steering System Air Removal
- 6.21. Steering Relief Pressure Check
- 6.22. Troubleshooting
- 7. RM0639-(03-2005)-UK-EN
- 7.1. Steering Axle
- 7.2. Safety Precautions Maintenance and Repair
- 7.3. General
- 7.4. Description
- 7.5. How to Put ReachStacker on Blocks
- 7.6. How to Lift Steer Tires
- 7.7. Steering Axle Assembly
- 7.8. Up to 1527
- 7.9. Install
- 7.10. Starting With 1528
- 7.11. Install
- 7.12. Wheels and Hubs
- 7.13. Remove and Disassemble
- 7.14. Assemble and Install
- 7.15. Spindles, Bearings, and Tie Rods
- 7.16. Install
- 7.17. Steering Cylinder
- 7.18. Up to 1532
- 7.19. Remove and Disassemble
- 7.20. Clean and Inspect
- 7.21. Assemble and Install
- 7.22. Starting With 1533
- 7.23. Remove and Disassemble
- 7.24. Clean and Inspect
- 7.25. Assemble and Install
- 7.26. Torque Specifications
- 7.27. Troubleshooting
- 8. RM0640-(03-2005)-UK-EN
- 8.1. Brake System
- 8.2. Safety Precautions Maintenance and Repair
- 8.3. General
- 8.4. Description and Operation
- 8.5. Accumulator Charge Valve
- 8.6. Relief Valves
- 8.7. Flow Regulator Valve
- 8.8. Check Valve
- 8.9. Brake Pedal Valves
- 8.10. Operation
- 8.11. Shuttle Valve
- 8.12. Solenoid Valve for Park Brake
- 8.13. Thermostatic Bypass Valve
- 8.14. Parking Brake
- 8.15. Auxiliary Brake
- 8.16. Oil-Cooled Service Brakes
- 8.17. Disc Service Brakes
- 8.18. Pressure Switch Replacement
- 8.19. Accumulator Charge Valve Repair
- 8.20. Remove and Disassemble
- 8.21. Clean and Inspect
- 8.22. Assemble and Install
- 8.23. Accumulator Replacement
- 8.24. Relief Valves Repair
- 8.25. Remove and Disassemble
- 8.26. Clean and Inspect
- 8.27. Assemble and Install
- 8.28. Relay Valve Repair
- 8.29. Remove and Disassemble
- 8.30. Clean and Inspect
- 8.31. Assemble
- 8.32. Install
- 8.33. Shuttle Valve Repair
- 8.34. Remove and Disassemble
- 8.35. Clean and Inspect
- 8.36. Assemble and Install
- 8.37. Brake Pedal Valves (Treadle Valves) Repair
- 8.38. Remove and Disassemble
- 8.39. Clean and Inspect
- 8.40. Assemble and Install
- 8.41. Inching Valve Repair
- 8.42. Disassemble
- 8.43. Clean and Inspect
- 8.44. Assemble
- 8.45. Install
- 8.46. Parking Brake Valve Repair
- 8.47. Disassemble
- 8.48. Clean and Inspect
- 8.49. Assemble
- 8.50. Install
- 8.51. Parking Brake Caliper Repair
- 8.52. Disassemble
- 8.53. Inspect
- 8.54. Assemble
- 8.55. Install and Adjust
- 8.56. Oil Brake Assembly Repair
- 8.57. Disassemble
- 8.58. Inspect
- 8.59. Assemble
- 8.60. Install
- 8.61. Service Brake Calipers
- 8.62. Disassemble
- 8.63. Inspect
- 8.64. Assemble
- 8.65. Install
- 8.66. Auxiliary Brake Caliper
- 8.67. Disassemble
- 8.68. Inspect
- 8.69. Assemble
- 8.70. Install
- 8.71. Remove Air From Brake System
- 8.72. Inching Adjustment
- 8.73. Service Brakes Wear Check
- 8.74. Troubleshooting
- 8.75. Accumulator Charge Valve (See Figure 9 )
- 9. RM0641-(03-2005)-UK-EN
- 9.1. Hydraulic System
- 9.2. Safety Precautions Maintenance and Repair
- 9.3. General
- 9.4. Description and Operation
- 9.5. Main Control Valve
- 9.6. Pilot Supply Valve
- 9.7. Boom Hoist Over Center Valve
- 9.8. Flow Amplifier
- 9.9. Main Control Valve
- 9.10. Description
- 9.11. Disassemble
- 9.12. Inspect
- 9.13. Assemble
- 9.14. Install
- 9.15. Outlet Section
- 9.16. Disassemble
- 9.17. Inspect
- 9.18. Assemble
- 9.19. Control Section
- 9.20. Disassemble
- 9.21. Inspect
- 9.22. Assemble
- 9.23. Control Valve Solenoid
- 9.24. Disassemble
- 9.25. Inspect
- 9.26. Assemble
- 9.27. Inlet Section
- 9.28. Disassemble
- 9.29. Inspect
- 9.30. Assemble
- 9.31. Pilot Pressure Relief Valve
- 9.32. Description
- 9.33. Disassemble
- 9.34. Inspect
- 9.35. Assemble
- 9.36. Install
- 9.37. Boom Hoist Over Center Valve
- 9.38. Description
- 9.39. Disassemble
- 9.40. Assemble
- 9.41. Install
- 9.42. Flow Amplifier
- 9.43. General
- 9.44. Description
- 9.45. Operation
- 9.46. Neutral Position
- 9.47. During Steering Function
- 9.48. Manual Steering Function
- 9.49. Install
- 9.50. Disassemble
- 9.51. Pressure Relief Valve
- 9.52. End Cover at PP Port
- 9.53. End Cover at LS Port
- 9.54. Directional Valve Spool
- 9.55. Priority Valve Spool
- 9.56. Pressure Control/Amplifier Valve Spool
- 9.57. Check Valve
- 9.58. Cushion/Suction Valves
- 9.59. Assemble
- 9.60. Hydraulic Test Block
- 9.61. Inspect
- 9.62. Install
- 9.63. Troubleshooting
- 10. RM0642-(03-2005)-UK-EN
- 10.1. Troubleshooting and Adjustments
- 10.2. Safety Precautions Maintenance and Repair
- 10.3. General
- 10.4. Replacement and Adjustment
- 10.5. Load Sensing System
- 10.6. Install
- 10.7. Pressure Sensors
- 10.8. Replace
- 10.9. Display Panel Light Bulbs
- 10.10. Replace
- 10.11. Display Panel Switches
- 10.12. Replace
- 10.13. Angle Potentiometer
- 10.14. Verify Boom Angle
- 10.15. Replace
- 10.16. Length Potentiometer
- 10.17. Verify Boom Length
- 10.18. Replace
- 10.19. Troubleshooting
- 10.20. System Errors
- 10.21. Analog Signal Errors
- 10.22. Operating Errors
- 10.23. Table 1. System Errors
- 10.24. Table 2. Analog Signal Errors
- 10.25. Table 3. Operating Errors
- 11. RM0644-(03-2005)-UK-EN
- 11.1. Hydraulic Pumps
- 11.2. Safety Precautions Maintenance and Repair
- 11.3. Description
- 11.4. Gear Pump Operation
- 11.5. Repairs – General
- 11.6. Pilot Pressure Hydraulic Pump Repair
- 11.7. Disassemble
- 11.8. Inspect
- 11.9. Assemble
- 11.10. Install
- 11.11. Attachment System Hydraulic Pump Repair
- 11.12. Disassemble
- 11.13. Inspect
- 11.14. Assemble
- 11.15. Install
- 11.16. Brake System Hydraulic Pump
- 11.17. Disassemble
- 11.18. Inspect
- 11.19. Assemble
- 11.20. Install
- 11.21. Pump Output Check
- 11.22. Hydraulic System Air Check
- 11.23. Troubleshooting
- 12. RM0647-(03-2005)-UK-EN
- 12.1. Electrical System
- 12.2. Safety Precautions Maintenance and Repair
- 12.3. General
- 12.4. Engine Electrical System
- 12.5. Batteries and Battery Disconnect
- 12.6. Alternator
- 12.7. Starting Circuit
- 12.8. Starter Repair
- 12.9. Sensors and Switches
- 12.10. Electrical System for Operator Compartment
- 12.11. Heater Components, Replace
- 12.12. Electrical Control System
- 12.13. Switch Controls
- 12.14. Instrument Panel Components, Replace
- 12.15. Joystick Switches
- 12.16. Replace
- 12.17. Joystick Internal Components
- 12.18. Intermodal Control Switches
- 12.19. Spreader Control Switches
- 12.20. Switch Replacement On Control Panels
- 12.21. Control Box Components
- 12.22. Kruger Electrical System
- 12.23. Troubleshooting



%20Service%20Manual&url=https://pdfrepairmanual.com/docs/hyster-b418-p1-6-p1-8-p2-0-p2-2-service-manual/&media=https://pdfrepairmanual.com/wp-content/uploads/2026/01/hyster-b418-p16-p18-p20-p22-service-manual-1.jpg)
%20Service%20Manual&url=https://pdfrepairmanual.com/docs/hyster-b160-j25-35bs-service-manual/&media=https://pdfrepairmanual.com/wp-content/uploads/2026/01/hyster-b160-j25-35bs-service-manual-1.jpg)


%20Service%20Manual&url=https://pdfrepairmanual.com/docs/hyster-a406-r1-4-r1-6-service-manual/&media=https://pdfrepairmanual.com/wp-content/uploads/2026/01/hyster-a406-r14-r16-service-manual-1.jpg)

%20Service%20Manual&url=https://pdfrepairmanual.com/docs/hyster-c010-s1-50-2-00xms-service-manual/&media=https://pdfrepairmanual.com/wp-content/uploads/2026/01/hyster-c010-s150-200xms-service-manual-1.jpg)
%20Service%20Manual&url=https://pdfrepairmanual.com/docs/hyster-b460-k1-0m-k1-0h-k1-0h-wp-service-manual/&media=https://pdfrepairmanual.com/wp-content/uploads/2026/01/hyster-b460-k10m-k10h-k10h-wp-service-manual-1.jpg)
There are no reviews yet.